Step by Step: File Copy with Rename
A File Copy and Rename Workflow — Single Flux Action Workflow
| Open the Flux Operations Console | http://localhost:7186 |
| Sign in | admin / admin (as defined when installing Flux) |
| Open the Designer | Click on the Designer Tab |
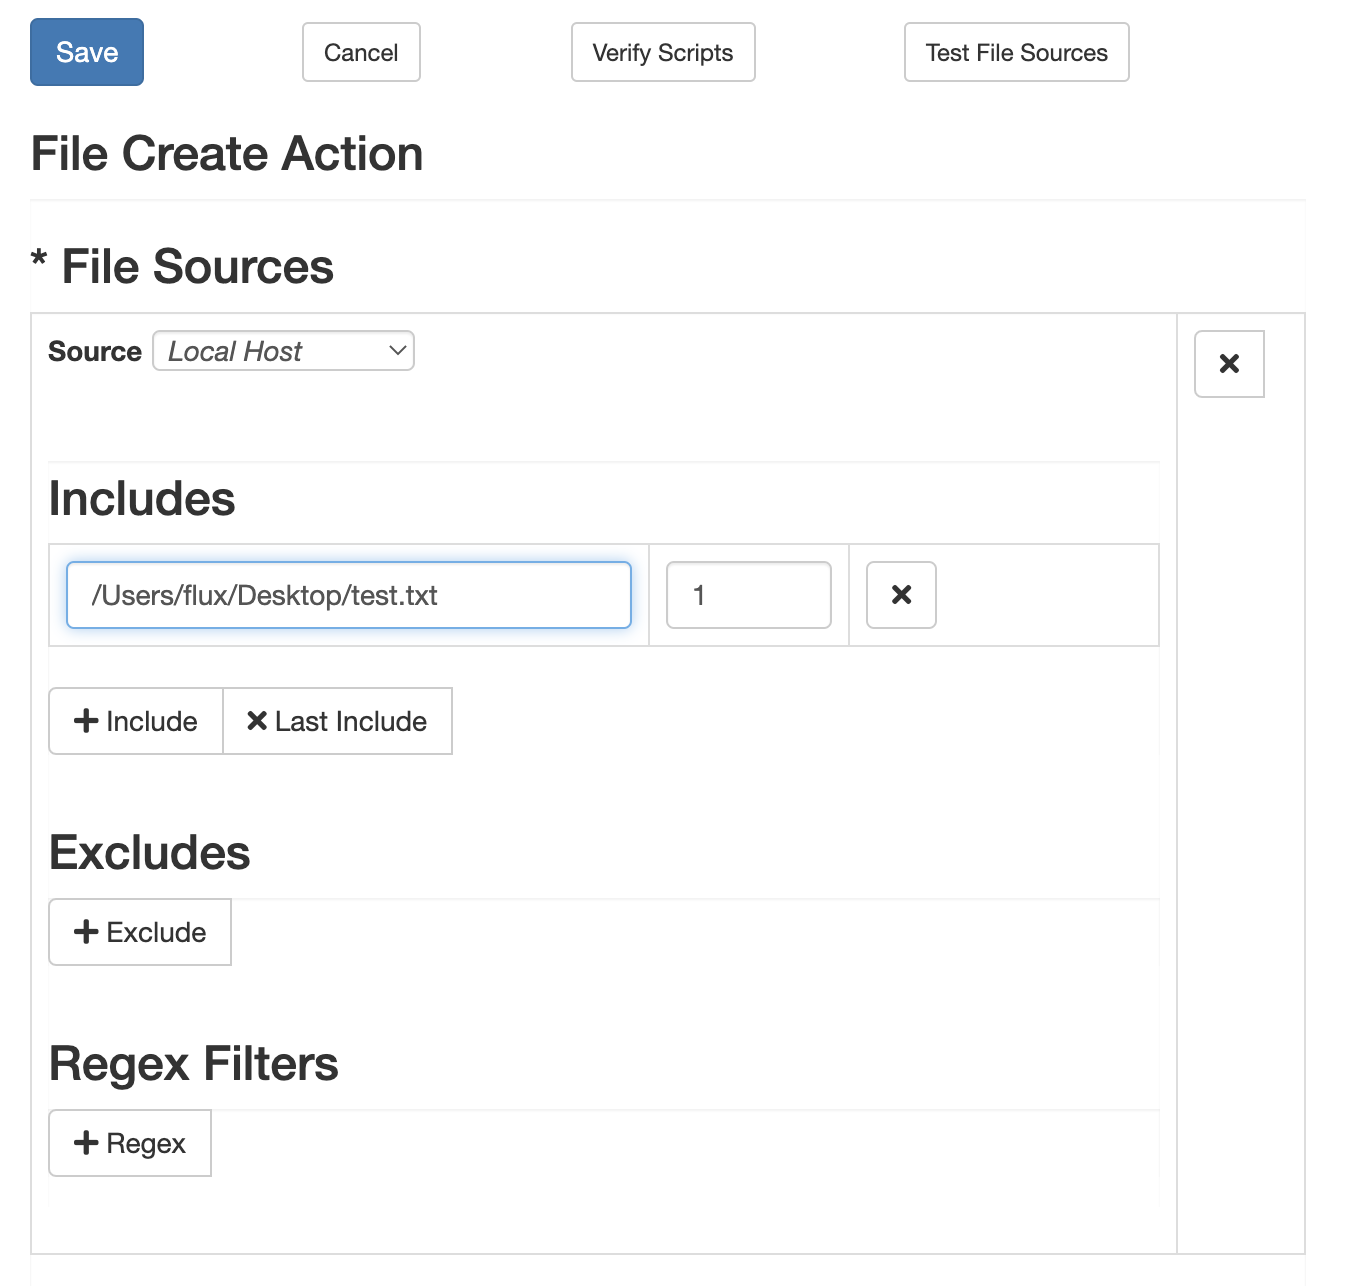
| Select a File Create Action | On the left sidebar, find the File Create icon under the File group. Click and drag it onto the Designer’s canvas. |
| Open the File Create Action’s dialog | Double click the File Create Action on the Designer canvas to open its dialog box. |
| Update the File Sources | Click the + under the file sources label. Update the “Source” to be “localhost” and click the + under the Includes section. Type in the directory you would like this file to be created and the name of the file (ex: /Users/flux/Desktop/test.txt) |
| Select a File Copy Action | Scroll down in the left sidebar, find the File Copy icon under the File group. Click and drag it onto the Designer’s canvas. |
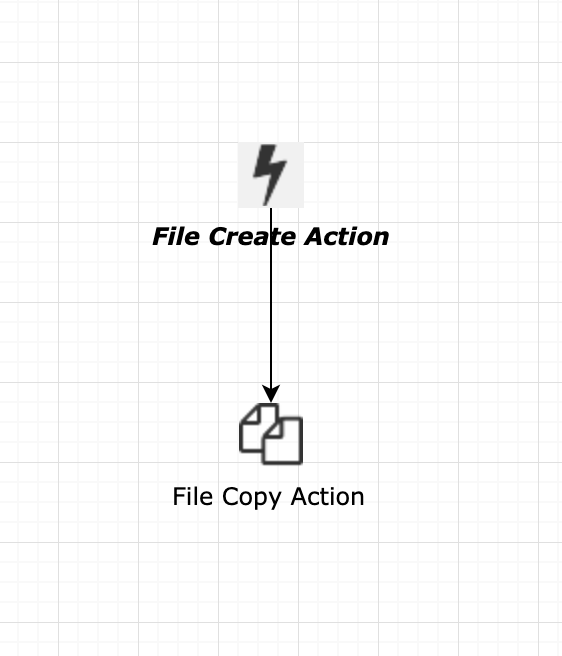
| Create a Flow between the File Create Action and File Copy Action | Hover your mouse over the File Create Action and you should see some blue arrows appear. Click and drag one of those blue arrows to the File Copy Action (a screenshot of the workflow is located below) |
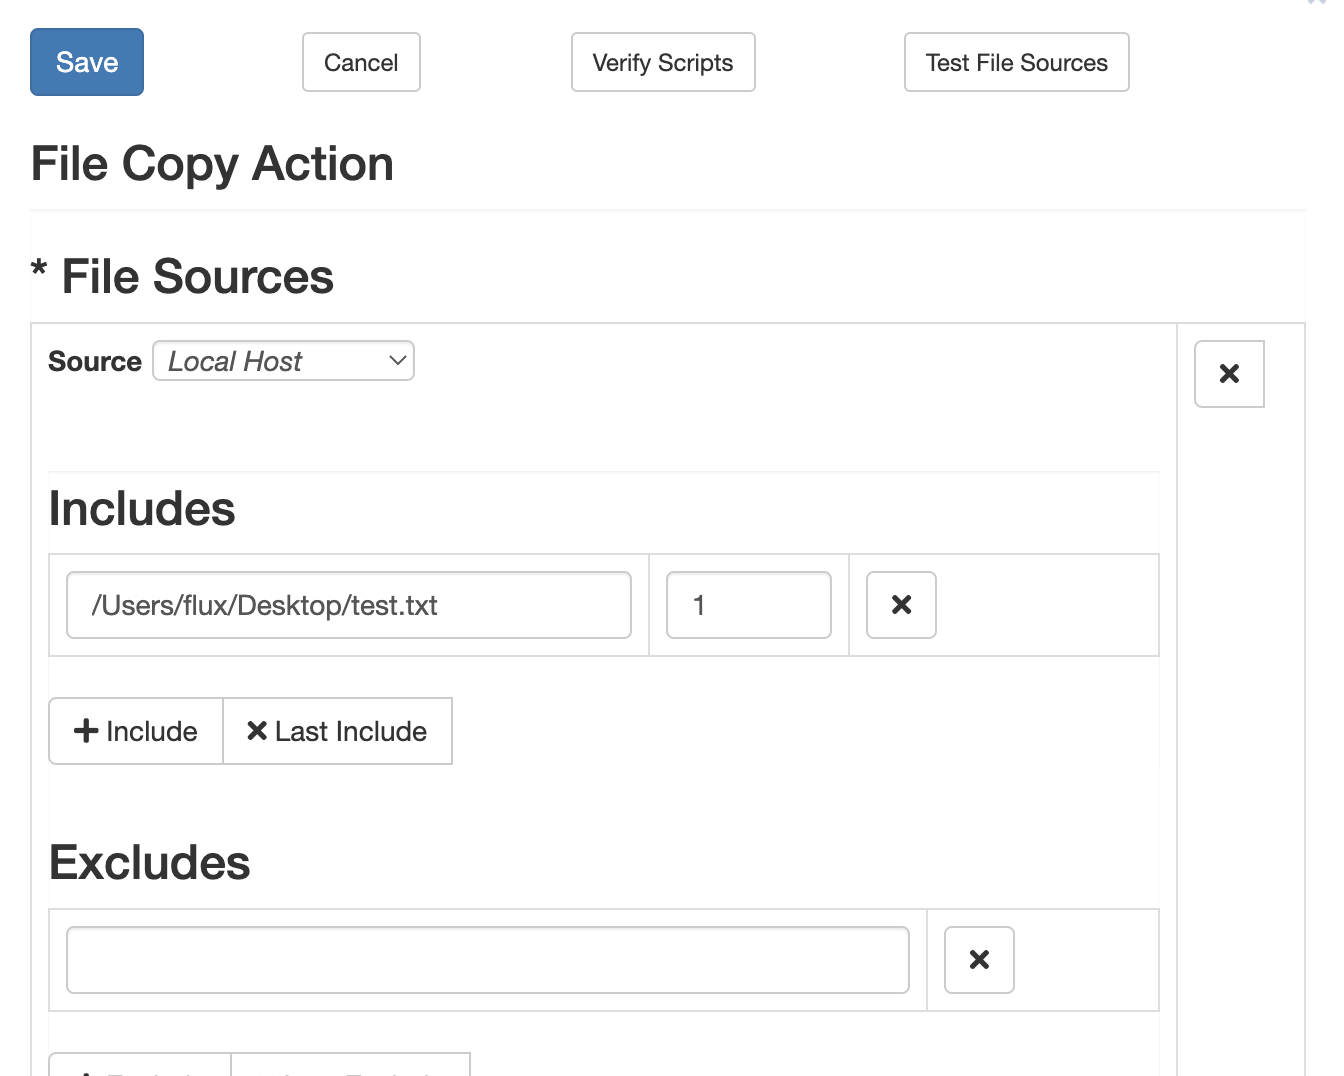
| Open the File Copy Action’s dialog | Double click the File Copy Action icon on the Designer canvas to open its dialog box. |
| Open the File Source | Click the + sign under the File Sources label. |
| Select the Source Type | Click the down arrow to the right of Source Predefined and select ‘localhost’. |
| Enter the directory from the File Copy Action | Click the + under the “Includes” heading. Enter the same directory and filename used in the File Create Action above (ex: /Users/flux/Desktop/test.txt) |
| Open the File Target (where you want to copy the files to) | Scroll down and click the + File Targets button. The Includes dialog will appear |
| Select the File Server Target Type | Click the down arrow to the right of Target Predefined and select Local Host. |
| Specify the Target destination directory | Specify the directory you would like your file copied to. (Ex: /Users/flux/processdirectory) Note: If this directory does not exist, Flux will throw an error. |
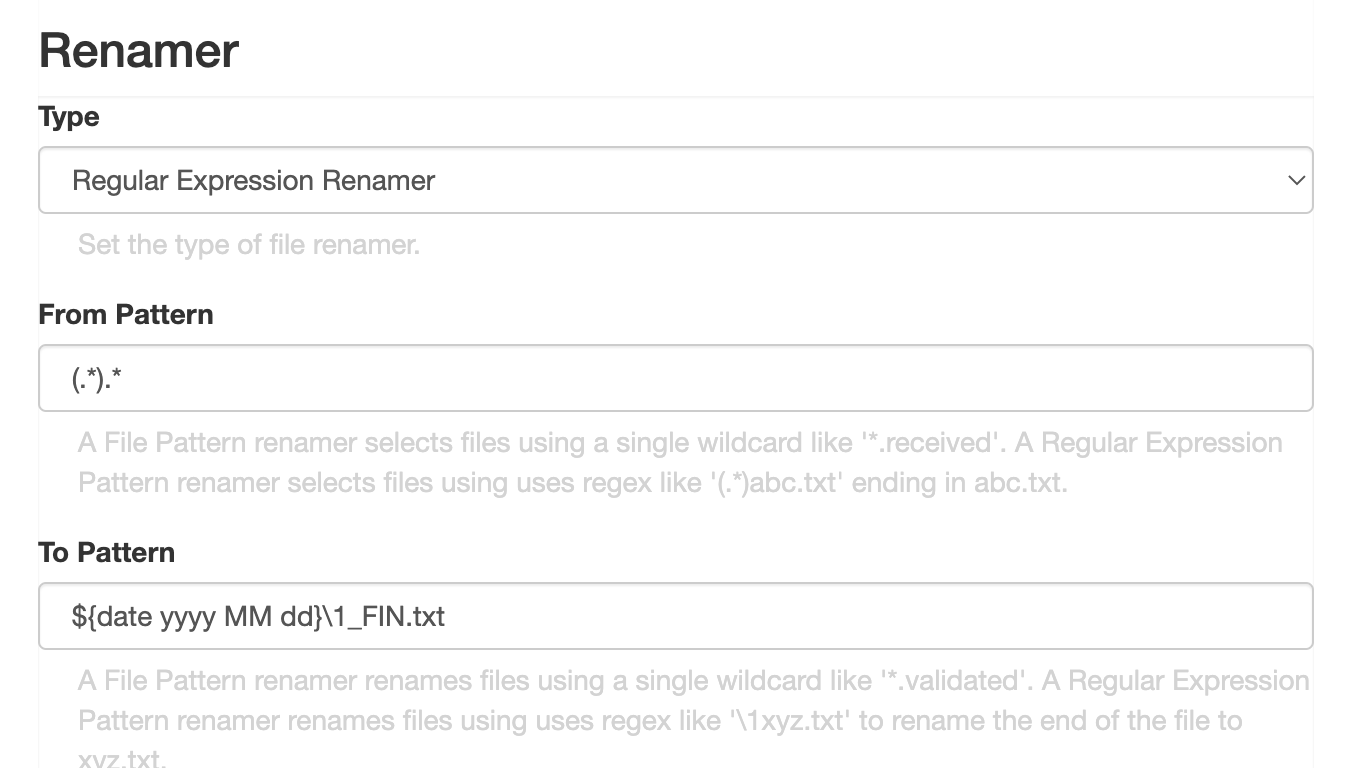
| Select the Renamer to use | Scroll down and select the Renamer Type. In this case select Regular Expression Renamer |
| Specify the From Pattern | Enter in the From Pattern the regular expression. In this case enter (.). |
| Specify the To Pattern | Enter in the To Pattern the regular expression. In this case enter: ${date yyyy MM dd}\1_FIN.txt |
| Save the Flux Action | Click CTRL-S to save this File Copy Action into the Flux workflow (in this case there are only 2 actions in the workflow). You can also click Save in the top left of the dialog. The Flux Action’s dialog will close. |
| Save the Flux Workflow to the Flux repository. | Click CTRL-S Again to save this workflow to the Flux Repository or Workflow Menu Save. You will get a prompt to name the workflow, or if the workflow is already named it will save the workflow and show an alert that the workflow has been saved. |
| Submit the workflow for execution | Click CTRL-E to submit the workflow for execution or Select the Workflow Menu Submit/Execute. A prompt will display in 1-3 seconds indicating the workflow has been submitted. |
| View the execution of the workflow | Click on the Dashboard tab at the top of the browser window. The workflow should appear in the tab’s table of workflows. Click the Refresh button in the Dashboard tab (not the browser refresh button) to refresh the display of workflows. When the workflow completes its status will show as COMPLETED. |
| View the audit activity or the workflow. | On the row containing the workflow – to the right – is an icon containing three dots (…). Click on this icon to jump to the audit trail for this workflow. Clicking this opens the audit trail dialog for this workflow. Click File (under the tabs at the top of the screen) to view the file activity that the workflow performed. |
| Check for success | Check the directory specified in the File Copy Action for the copied files. |