Quick Start Guide
This guide assumes that you have already downloaded and installed Flux.
There are two primary components of Flux: workflows, which describe what actions or operations should run, when they should run, and how they relate to one another, and the engine, which drives the execution of workflows and determines when and how the workflows themselves are executed.
A workflow is composed of several pieces that describe what the workflow should do (and when). Actions allow you to perform an action (like running a process or Java code), triggers allow you to wait for a time, date, or event before proceeding, and flows describe how triggers and actions relate to one another (in other words, what order the triggers and actions should follow).
Scheduling, therefore, is the use of triggers to specify when the other triggers and actions in your workflow should run.
In this guide, we will look at the most frequently used trigger in Flux: the timer trigger. The Flux timer trigger allows your workflow to execute at certain times, on certain dates, or on a repeating schedule. The timer trigger can be used to create a completely customized schedule that precisely matches your time- and date-based scheduling requirements, as simple or complex as they may be.
If you are planning to use the web-based interface (also called the Operations Console) to interact with Flux, follow the instructions below under the heading “IT Staff”. If you are planning to use the Java APIs instead, see the code example located under the “Software Developers” heading below.
IT Professionals
For this example, we’ll use the Flux Operations Console and the Web-based Designer to view and run a workflow that executes on a given schedule using a timer trigger. We will do this in two steps:
- Start a Flux engine, then start and access the Operations Console.
- Use the Flux Designer to create a workflow, then export it to the engine to run it.
Starting the Engine and Operations Console
To get started, open the Operations Console by running the following steps:
- Start the Flux engine. You can easily start the engine by running the start-engine script, located in the Flux installation directory.
- If you have installed Flux on Windows using the .exe installer, the Flux engine should also be installed as a Windows service. You can use the Windows services control panel to easily start and stop the engine, as an alternative to using the start-engine script.
- Start the Operations Console. You can start the Console by running the start-opsconsole script from your Flux installation directory.
- Like the engine in step 1, the Operations Console may be installed as a Windows service if you have installed it from the .exe. You can use the Windows services control panel to start and stop the Operations Console as well.
-
Open a web browser and navigate to the Operations Console by entering the URL
http://<host>_:7186, where<host>is the hostname of the machine where you ran the start-opsconsole script if your browser is running on the same server as that script, you can use http://localhost:7186 - A sign-in page will appear, prompting you for your user credentials. Use the default username and password “admin” to continue:
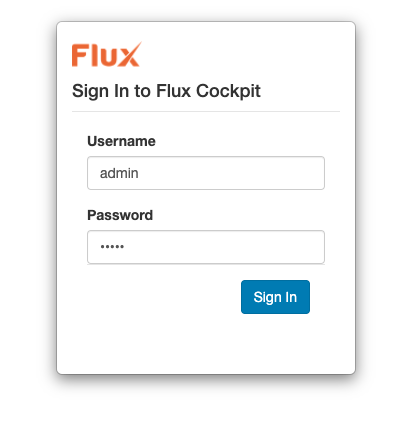
5.After signing in, you will arrive at the home page of the Operations Console. From this page, you can view workflows running on the engine (if any are running) and access all of the components of the Operations Console.
Designing and Running the Workflow
Now that you’ve launched the Operations Console and accessed the home page, the next step is to create a workflow. In this case, we will be designing a workflow that uses a repeating, time-based schedule to launch a process on the system.
Follow these steps to create and run the workflow:
1.Click the “Designer” tab in the Operations Console’s navigation bar:
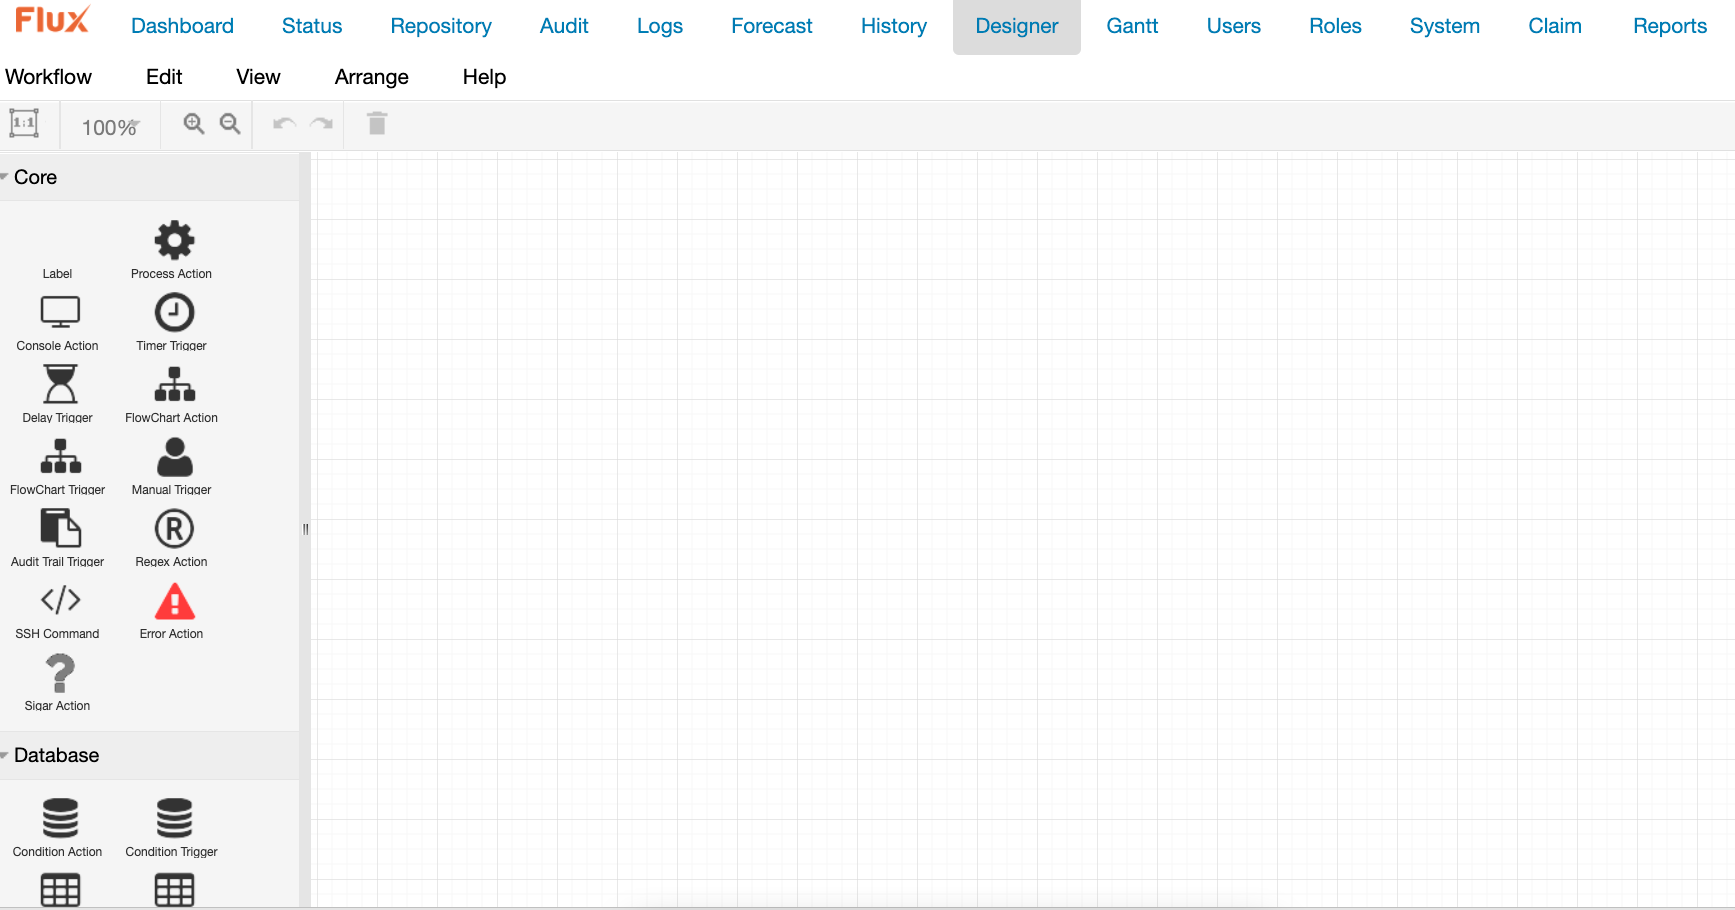
2.Notice the “Actions & Triggers” panel on the left-hand side of the screen. This panel contains all of the triggers and actions you can use to design your workflows. The triggers and actions are divided by functionality into several groups,
-
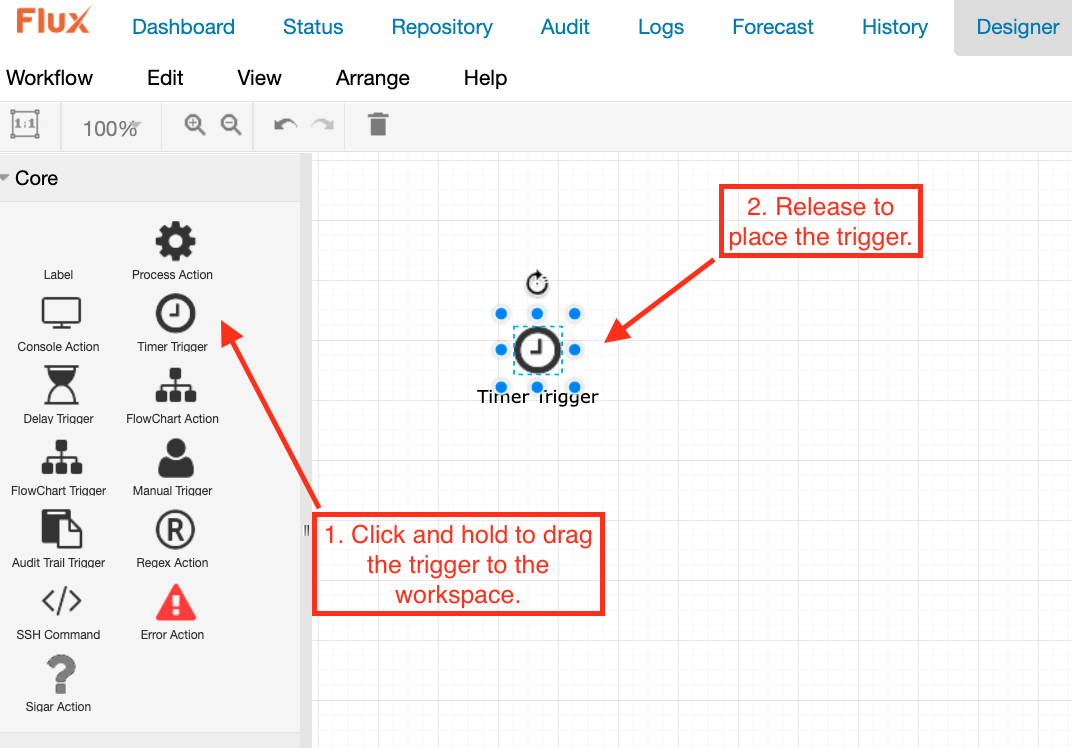
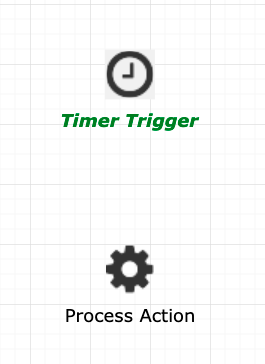
In this case, we are interested in the Timer Trigger. Find the Timer Trigger in the “Core” section, then click and hold with the left mouse button and drag the trigger to the workspace. Release the mouse button to place the trigger. You can rename actions by single-clicking on them, then typing the new name.
-
3.Repeat the process, but this time add a process action to the workflow. Your workflow should now look something like this:
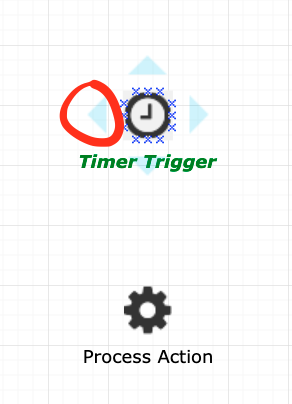
4.To connect these actions together, hover over the Timer Trigger and there will be a set of four, light blue arrows that appear around the action. When you click and hold on this arrow, you will be able to drag a connecting line between the two actions, called a “flow”. This will allow you to express to Flux which triggers and actions should run and in what order. In other words, flows tell Flux what sequence your triggers and actions will run in.
To add a flow from one trigger or action to another, just click and hold the mouse on the trigger or action you want to flow from, then drag the cursor to the trigger or action you want to flow to and release the mouse button. Once you’ve created the flow, it will automatically be selected on the page, and you can use the on-screen tools to visually move or reorganize the flow as needed (NOTE: in some browsers, the flows may appear to be unusually shaped or missing their directional arrow icon. If this occurs, just click “Save to Repository” in the lower right-hand corner of the screen, click the “Repository” tab in the console, select your workflow, and click “Edit”. Your flows should now appear as normal on the screen).
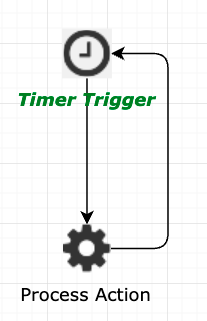
For this example, just add one flow from the timer trigger to the process action, then another flow back from the process action to the timer trigger. This will complete what is known in Flux as a “loop”: a series of triggers and actions that run in a repeated sequence. In this case, the timer trigger will wait for a certain time to occur, flow into the process action (which will then execute), and finally flow back into the timer trigger to wait for the next scheduled date and time.
5.Now that the actions and flows have been created, it’s time to set up the action properties that will tell Flux when or how each trigger and action will run. First, double-click the Timer Trigger to bring up its “Action Properties” panel.
- For this trigger, make sure that the “Start Action” property is selected. This property indicates that, when the workflow begins executing, this is the first trigger that should run.
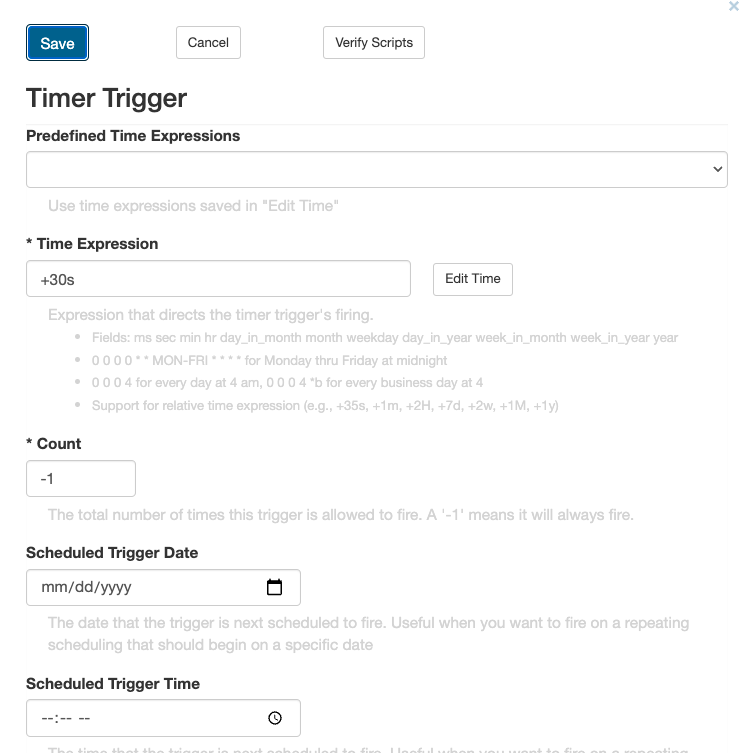
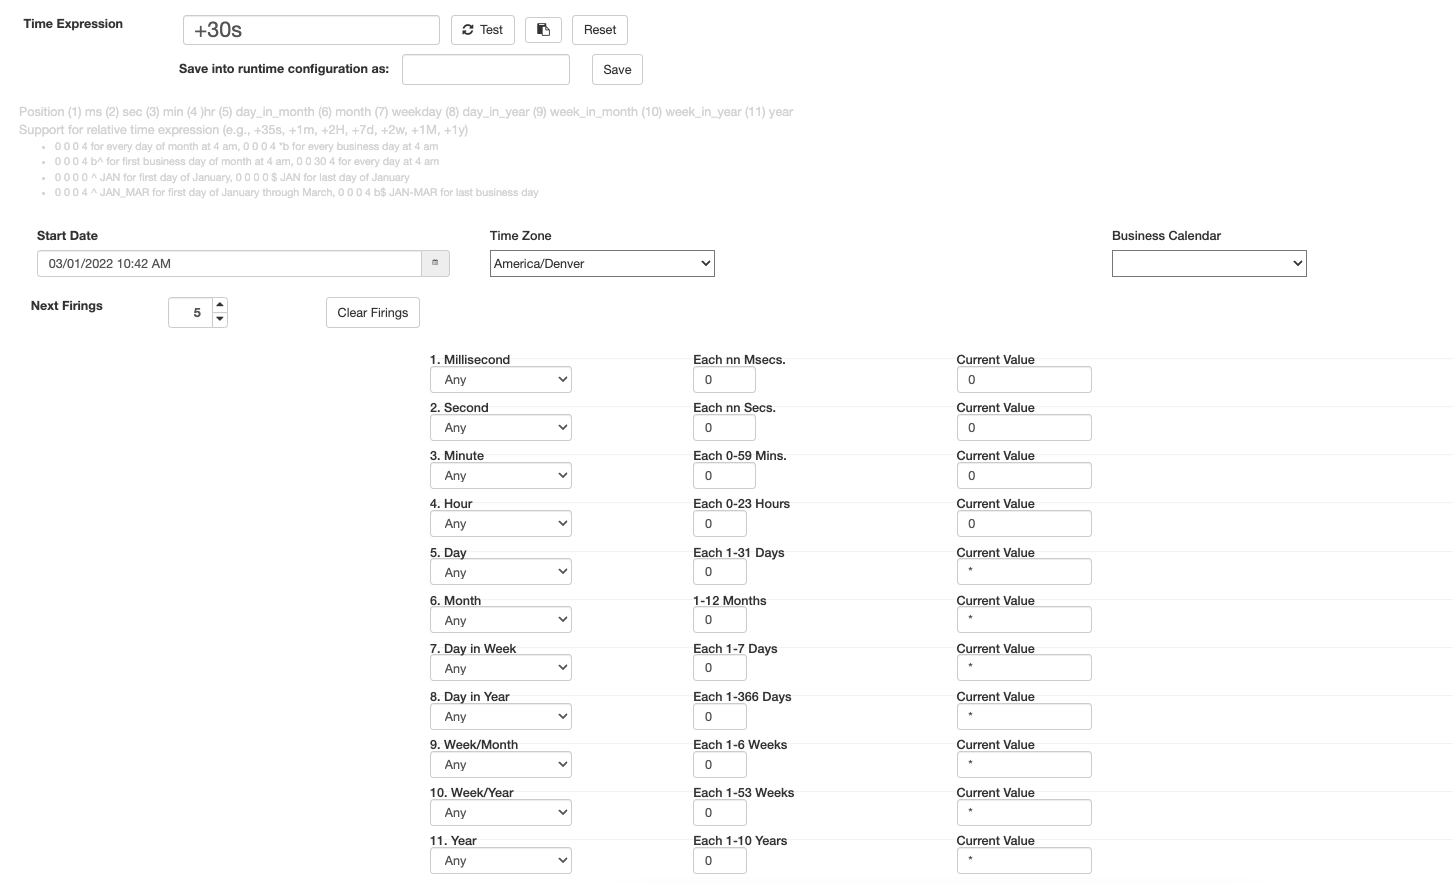
6.With the “Action Properties” panel still open, click the “Edit Time” button just to the right of the “Time Expression” property. This will launch the time expression editor, which you can use to configure when (and how often) the timer trigger will execute.
- You can use this editor to help design time expressions that are as complicated (or as simple) as you need. In this case, we’ll just give the trigger an expression of *0 0 +30 8-12 * * mon-fri * * * **, which means “every 30 minutes, from 08:00 to 12:00, Monday through Friday”. Once you’ve set up the time expression, click “Save” to save your changes, then “OK” to save the properties on the timer trigger.
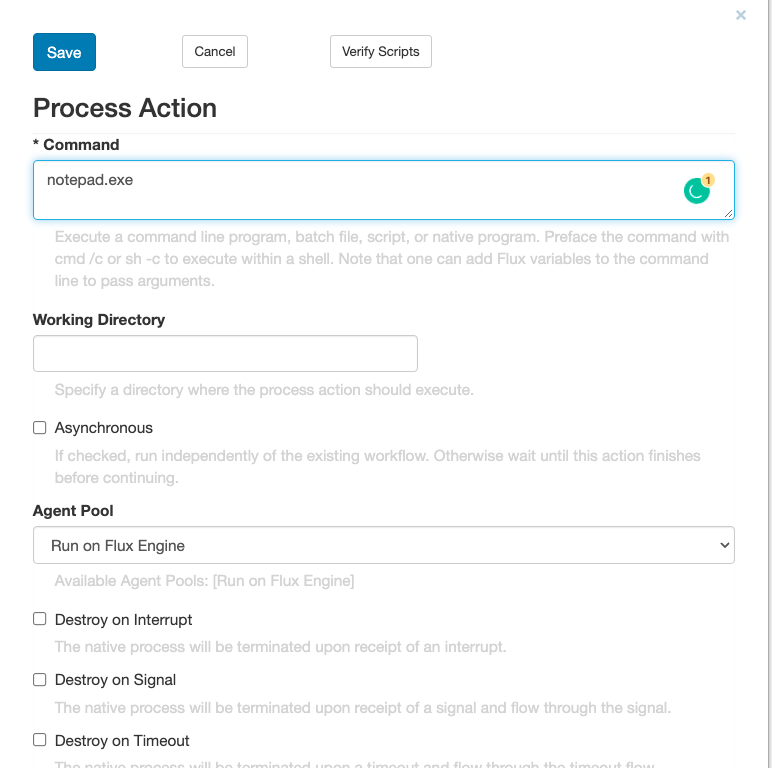
7.Double-click the process action to open its “Action Properties” window. You’ll notice the process action shares several properties with the Timer Trigger. In this case, make sure that the “Start Action” property is not set, since we want the timer trigger to run first for this example.
For this action, you will need to set the “Command” property, which tells Flux which command or process should launch when this action executes. For this example, we’ve chosen the command notepad.exe, which should be available by default on all Windows machines. If you’re using a Unix system, or if you just want to try a different command, you’ll need to change this to use whichever command you’d prefer instead.
The command your Process Action uses must be available from the system path in order for Flux to invoke it. If your command isn’t available on the path, you’ll need to provide the full path to the command (for example, C:\system32\notepad.exe). For more information on this, see Process Action.
Once you’ve configured the action to run your command, click “OK” to save your changes.
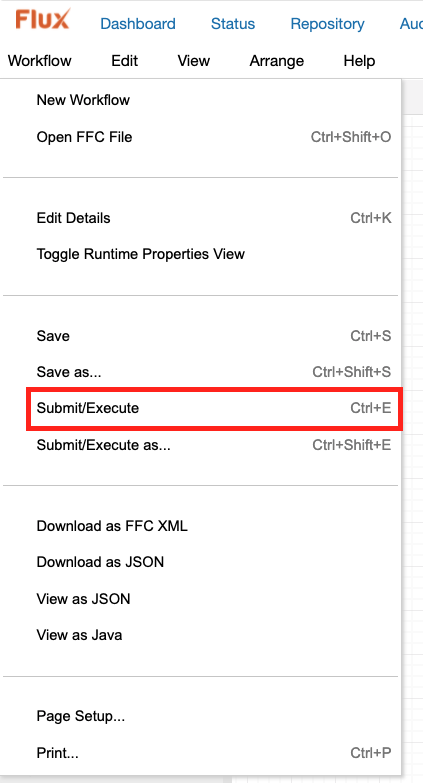
8.Your workflow is now configured and ready to run! If you’d like to save your changes now, click the “Workflow” tab in the top left corner of the page and select the “Save” option from the dropdown. Otherwise, just click “Submit/Execute” from the same dropdown menu to begin running your workflow.
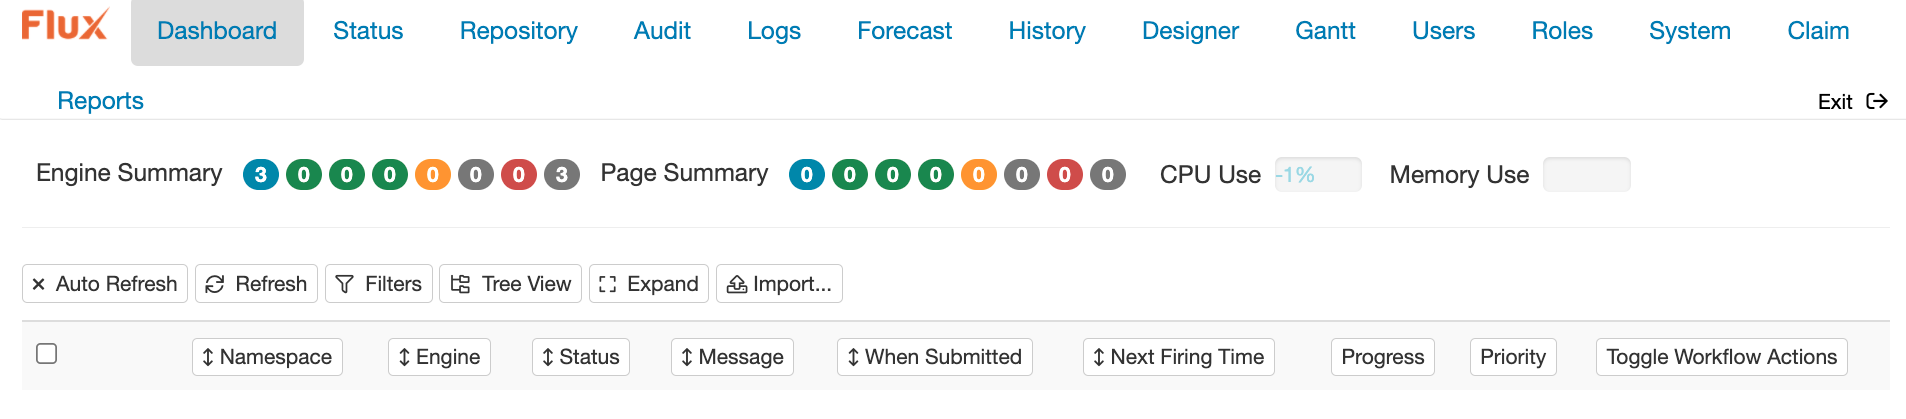
9.If the workflow was exported into the Flux engine successfully, a confirmation message will appear. You can then navigate to the “Dashboard” tab to track the progress of your workflow.
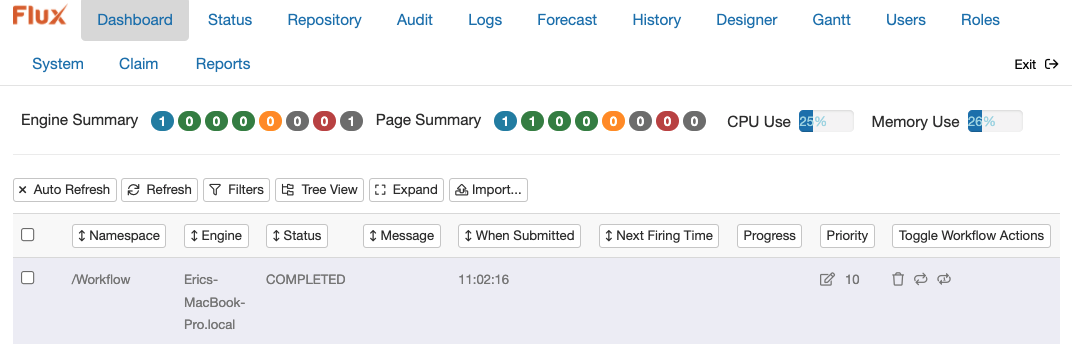
That’s it! Your workflow is now running on the Flux engine. Beginning at 08:00, and continuing every half-hour until 12:00, you will see the process or executable you specified in the Process Action’s “Command” kick-off and execute.
A complete working copy of this workflow is also included in doc/quick_start_guides/quick_start_job_scheduling/end_users/Job Scheduling.ffc under your Flux installation directory. To load this file, just visit the Repository page on the console, then click the “Import” button on that page and find the Job Scheduling.ffc file. Once the workflow file is loaded, you can use the tools on the Repository page to view and edit the sample workflow.
Software Developers
The following Java code demonstrates how you can easily set up an engine, design a workflow, and run that workflow on your engine.
To run the code below, just save it to a file named JobScheduling.java, compile it (the code below is compatible with standard Java complication tools, as well as any Java IDE like Eclipse or IntelliJ IDEA), and execute it. For your benefit, a pre-compiled version of the same code is also available in doc/quick_start_guides/quick_start_job_scheduling/software_developers under your Flux installation directory.
Packages in Java
The code below is configured to use the package doc.quick_start_guides.quick_start_job_scheduling.software_developers. The directory structure containing your .java file must match the package structure, and the javac and java tools may require special settings when running a class under a package; keep this in mind when compiling and running your code.
For more information on package structure and its relation to the file system path, see the Java package documentation.
package doc.quick_start_guides.quick_start_job_scheduling.software_developers;

import flux.ActionListener;
import flux.Cron;
import flux.CronColumn;
import flux.Engine;
import flux.EngineHelper;
import flux.Factory;
import flux.FlowChart;
import flux.JavaAction;
import flux.KeyFlowContext;
import flux.TimerTrigger;

/**
 * Quick Start example for scheduling Java code for execution.
 */
public class JobScheduling {

  //  Create a Flux factory, from which all other Flux objects are derived.
  Factory factory = Factory.makeInstance();

  //  Create a fresh cron.
  Cron cron = EngineHelper.makeCron();

  public JobScheduling() throws Exception {

    //  Create a workflow.
    FlowChart flowChart = EngineHelper.makeFlowChart("Workflow");

    //  Create a timer trigger.
    TimerTrigger timer = flowChart.makeTimerTrigger("Timer");
    timer.setStartAction(true);

    //  Fires every 10 seconds , every minute, every hour, Monday-Friday.
    cron.add(CronColumn.MILLISECOND, 0);
    cron.addAll(CronColumn.SECOND, 10);
    System.out.println("The Cron that is produced is " + "\"" + cron.toString() + "\"");

    //  The created cron must be set here.
    timer.setTimeExpression(cron.toString());

    //  Work week cron shown below. Fires every 15 minutes, 8-12 am, and 1-5 pm,
    //  Monday-Friday.
    //  cron.add(CronColumn.MILLISECOND, 0);
    //  cron.add(CronColumn.SECOND, 0);
    //  cron.addAll(CronColumn.MINUTE, 15);
    //  cron.add(CronColumn.HOUR, 8,12);
    //  cron.add(CronColumn.HOUR, 13,15);
    //  cron.add(CronColumn.DAY_OF_WEEK, Cron.MONDAY, Cron.FRIDAY);

    //  Create a Java Action to implement your Java code in Flux.
    JavaAction javaAction = flowChart.makeJavaAction("Java Action");
    javaAction.setListener(JavaCode.class);

    //  Create flows from each action.
    timer.addFlow(javaAction);
    javaAction.addFlow(timer);

    //  Create a Flux engine.
    Engine engine = factory.makeEngine();

    //  Add the workflow into the engine to execute.
    engine.put(flowChart);

    //  Start the engine.
    engine.start();

    //  Wait for the user to press any key before the engine is disposed.
    System.in.read();
    System.out.println("The engine has been disposed.");
    engine.dispose();
  } // end constructor

  /**
   *  Listener for the Java Action. Put your Java Class into this listener.
   */
  public static class JavaCode implements ActionListener {

    public Object actionFired(KeyFlowContext flowContext) throws Exception {
      System.out.println("Your Java Code Goes Here!");
      return null;
    } // end actionFired()

  } // end JavaCode

  /**
   *  A simple way to run this example.
   */
  public static void main(String[] args) throws Exception {
    new JobScheduling();
  } // end main()

} // end JobScheduling