Mail Trigger Example Workflow
This example demonstrates how to configure the Mail Trigger to watch a mail server for incoming messages, and how to use the data retrieved by the Mail Trigger later on in the workflow.
This example uses the Web-based Designer to create a configure a workflow. If you are not familiar with using the Web-based Designer, see the quick start guide before proceeding with the example.
Configuring the Mail Trigger
To use the Mail Trigger in the workflow, we’ll first need to create and configure the Mail Trigger to watch a server for emails. To get started:
-
Create a new workflow by opening the Designer in the Operations Console.

- Add a Mail Trigger to your workflow by dragging it onto the canvas from the “Notification” section of the “Actions & Triggers” menu.
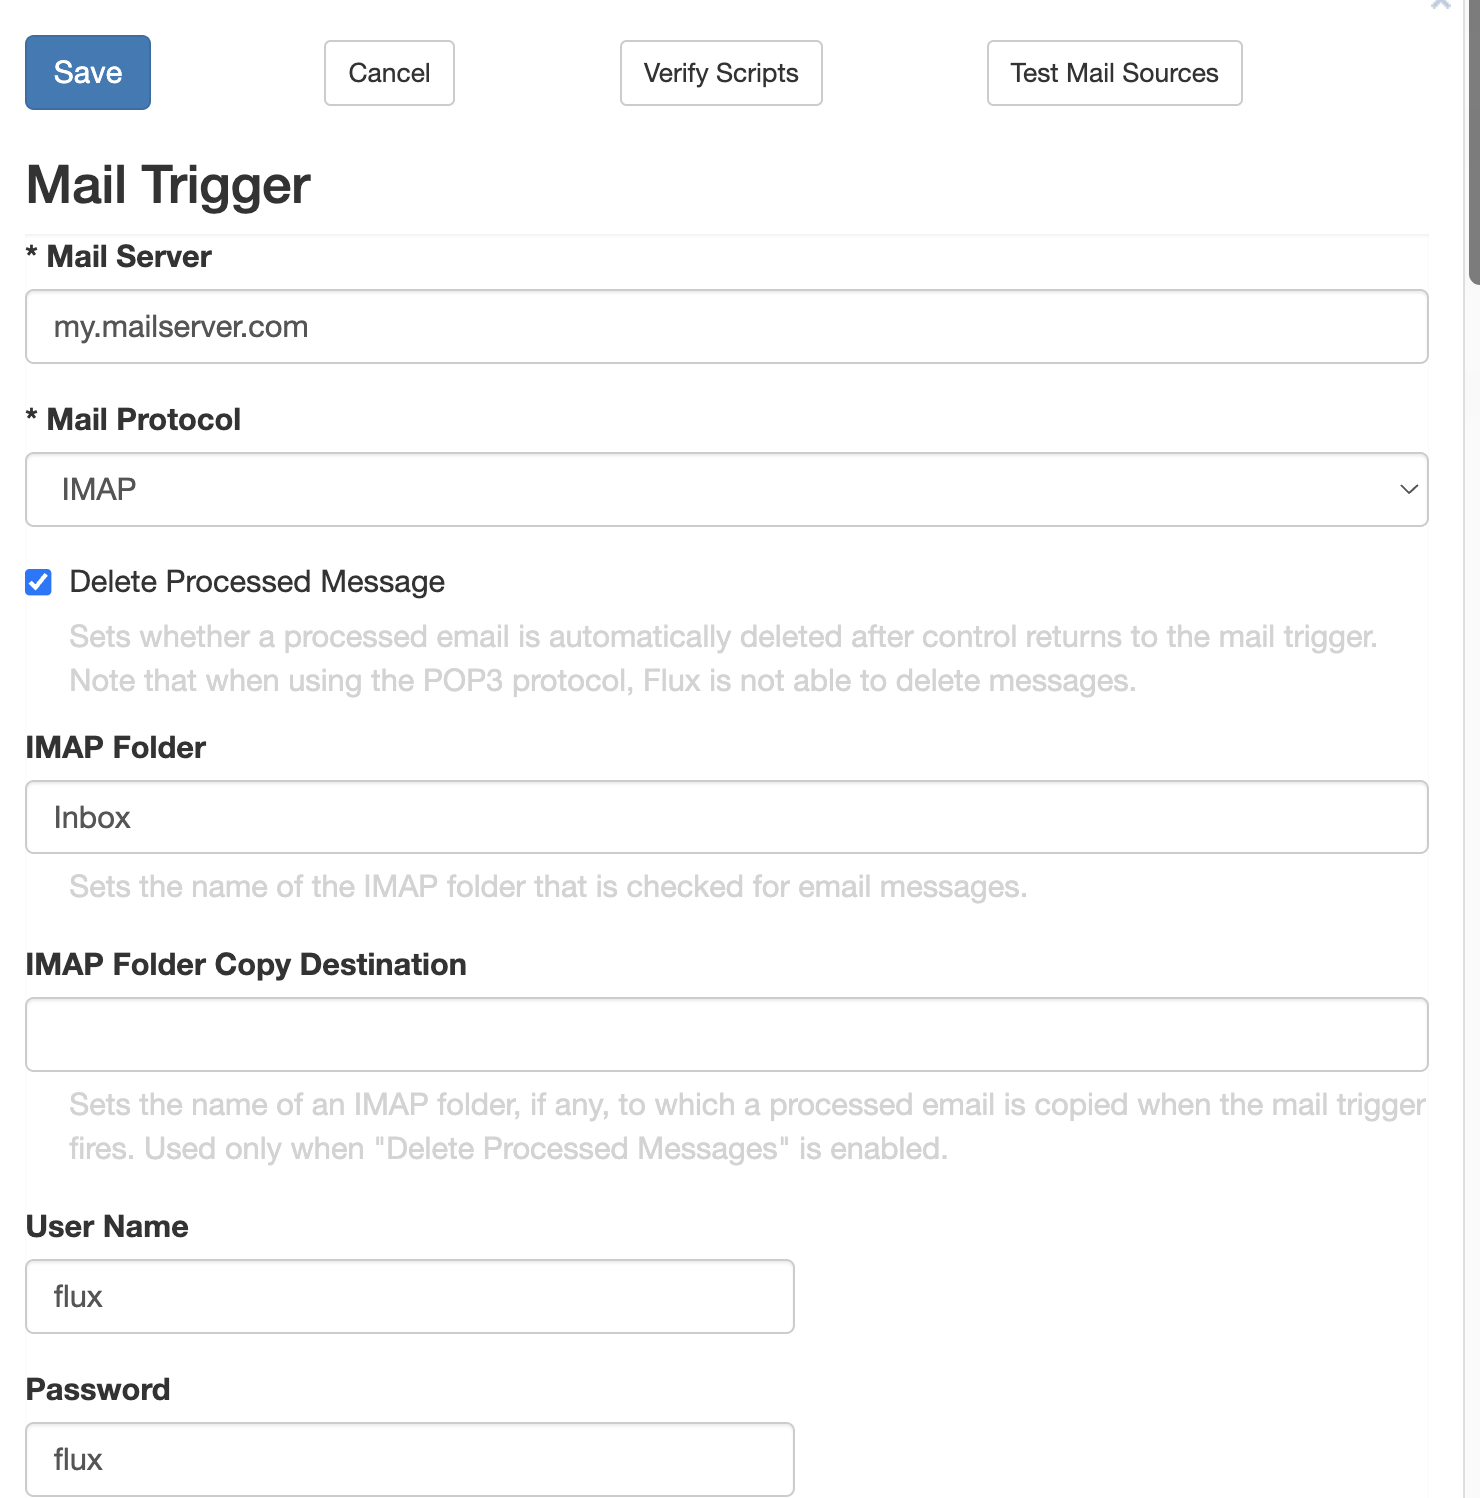
- Double-click the Mail Trigger to display its properties. The properties dialog allows you to configure the Mail Trigger with the information it will need to locate your mail server and pick up mail. Set the following properties, which are required for the Mail Trigger to operate:
- Password: The password Flux should use to log in to your mail server.
- Mail Server: The network location of the mail server. This can be set to either the host name or the IP address of your server.
- Username: The username Flux should use to log in to your mail server.
- Protocol: Flux automatically sets the protocol to IMAP, but POP3 can also be used.
- IMAP Folder: The IMAP folder on the server where Flux should watch for messages. Can be any folder the user has available on the server, including “Inbox”.
- In addition to the required properties listed above, you will notice some other (optional) properties available to allow additional configuration of the trigger. Although these properties are not required, you can set them to further configure the trigger:
- Port: The port number Flux should use when accessing the mail server.
- Delete Processed Message: if this property is enabled, Flux will automatically delete every email it finds after processing the email. Emails are not immediately deleted when the trigger runs – to delete the email, you must have a flow in the workflow loop back to this trigger (to indicate that processing has completed and we are ready for the next message).
- IMAP Folder Copy Destination: If this is set and delete processed message is not enabled, then Flux will automatically move processed emails to this folder location once they are finished processing (that is, once a flow loops back to this trigger).
Mail Trigger Performance in a Looping Workflow
If neither the delete processed message nor the IMAP folder copy destination is set, the Mail Trigger will repeatedly pick up the first message in the specified folder (as the trigger has no mechanism to distinguish between mails it has not already picked up and mails that it has). This can cause high CPU/memory usage or performance problems if your workflow contains a loop back to the Mail Trigger, as the trigger will repeatedly fire (very quickly) on the same message over and over. For this reason, we strongly suggest enabling one of those two properties.
Configuring these settings is necessary to locate your mail server and, optionally, folder. Once you are finished, your trigger properties should look something like this:
That’s it! Your Mail Trigger is now configured and ready to use.
Viewing the Mail Trigger’s Results
If you’ve already tried to run the Mail Trigger created above, you’ll notice that you have no easy way of viewing what message (if any) was picked up. We’ll need to configure the workflow to print more information about the message.
To do that, we’ll use a Console Action to display all of the information to the engine’s standard output. Follow these steps to set that up:
- Add a Console Action to your workflow.
- Add a flow from the Mail Trigger to the Console Action.
- Double-click the newly created flow. Click the “+” under the “Runtime Data Map” heading. We’ll use the data map to pass information from the mail trigger to the Console Action where it can be printed.
-
Set the source to “Flow Context Source” and type RESULT.subject into the “Source Value” box. Next, set the target to “Flow Context Target” and type subject into the “Target Value” box. This will map the “subject” result property of the Mail Trigger to a new flow context variable called “subject”. For a complete list of result properties available for mapping, see Mail Trigger.
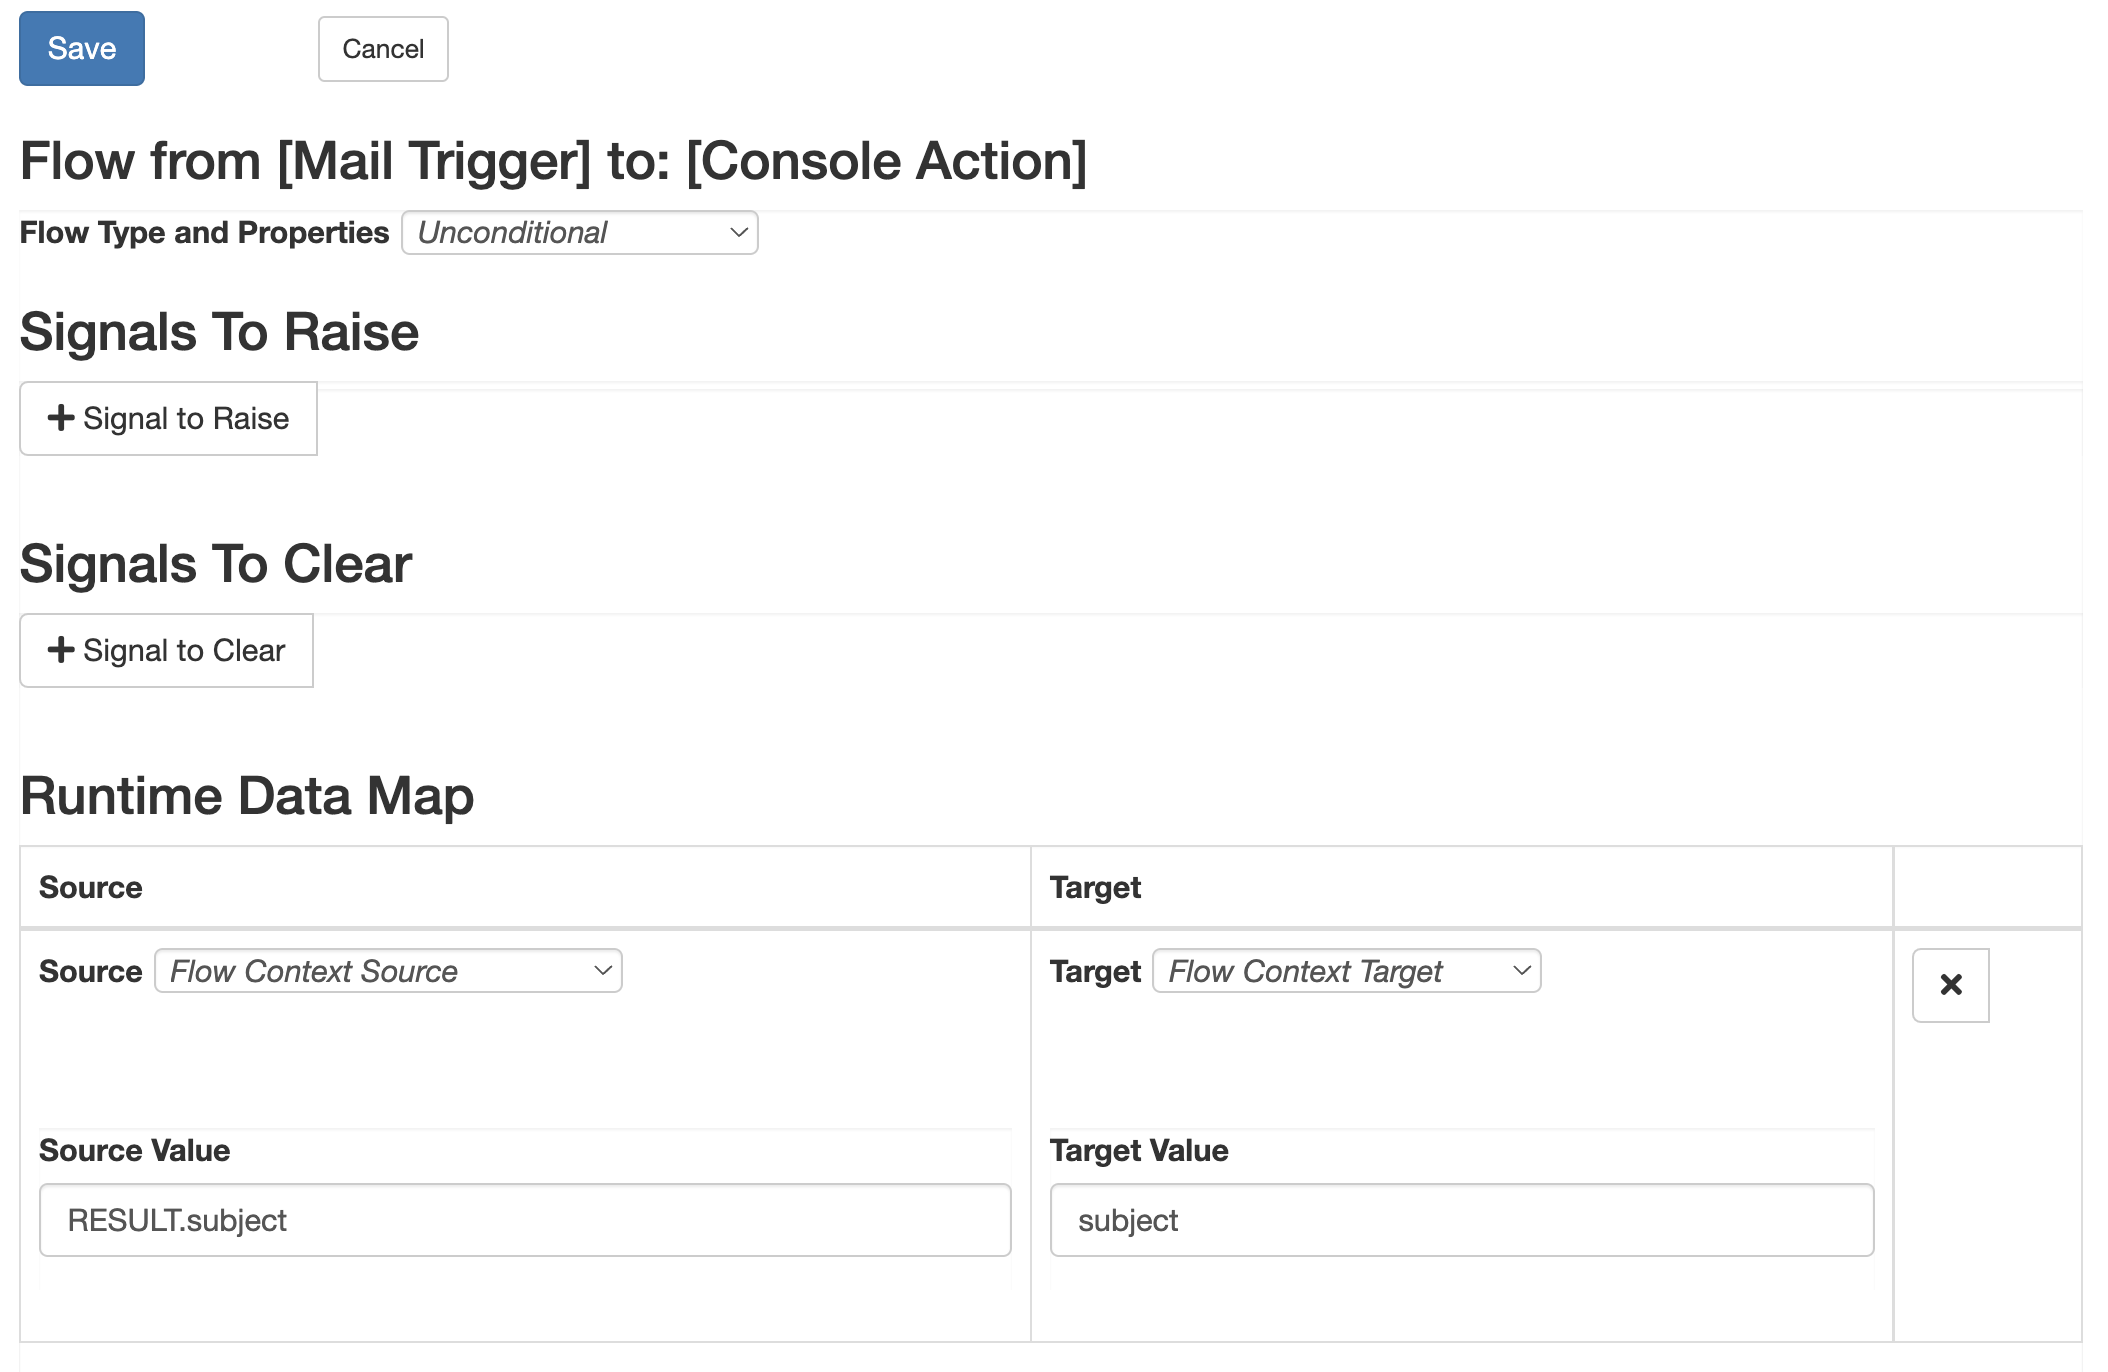
- Click the “Save” button to save your changes.
- Open the Console Action’s properties and set the “Message” field to ${subject}. This Variable Substitution syntax allows the Console Action to print the value of the “subject” flow context variable that was mapped in step 4.
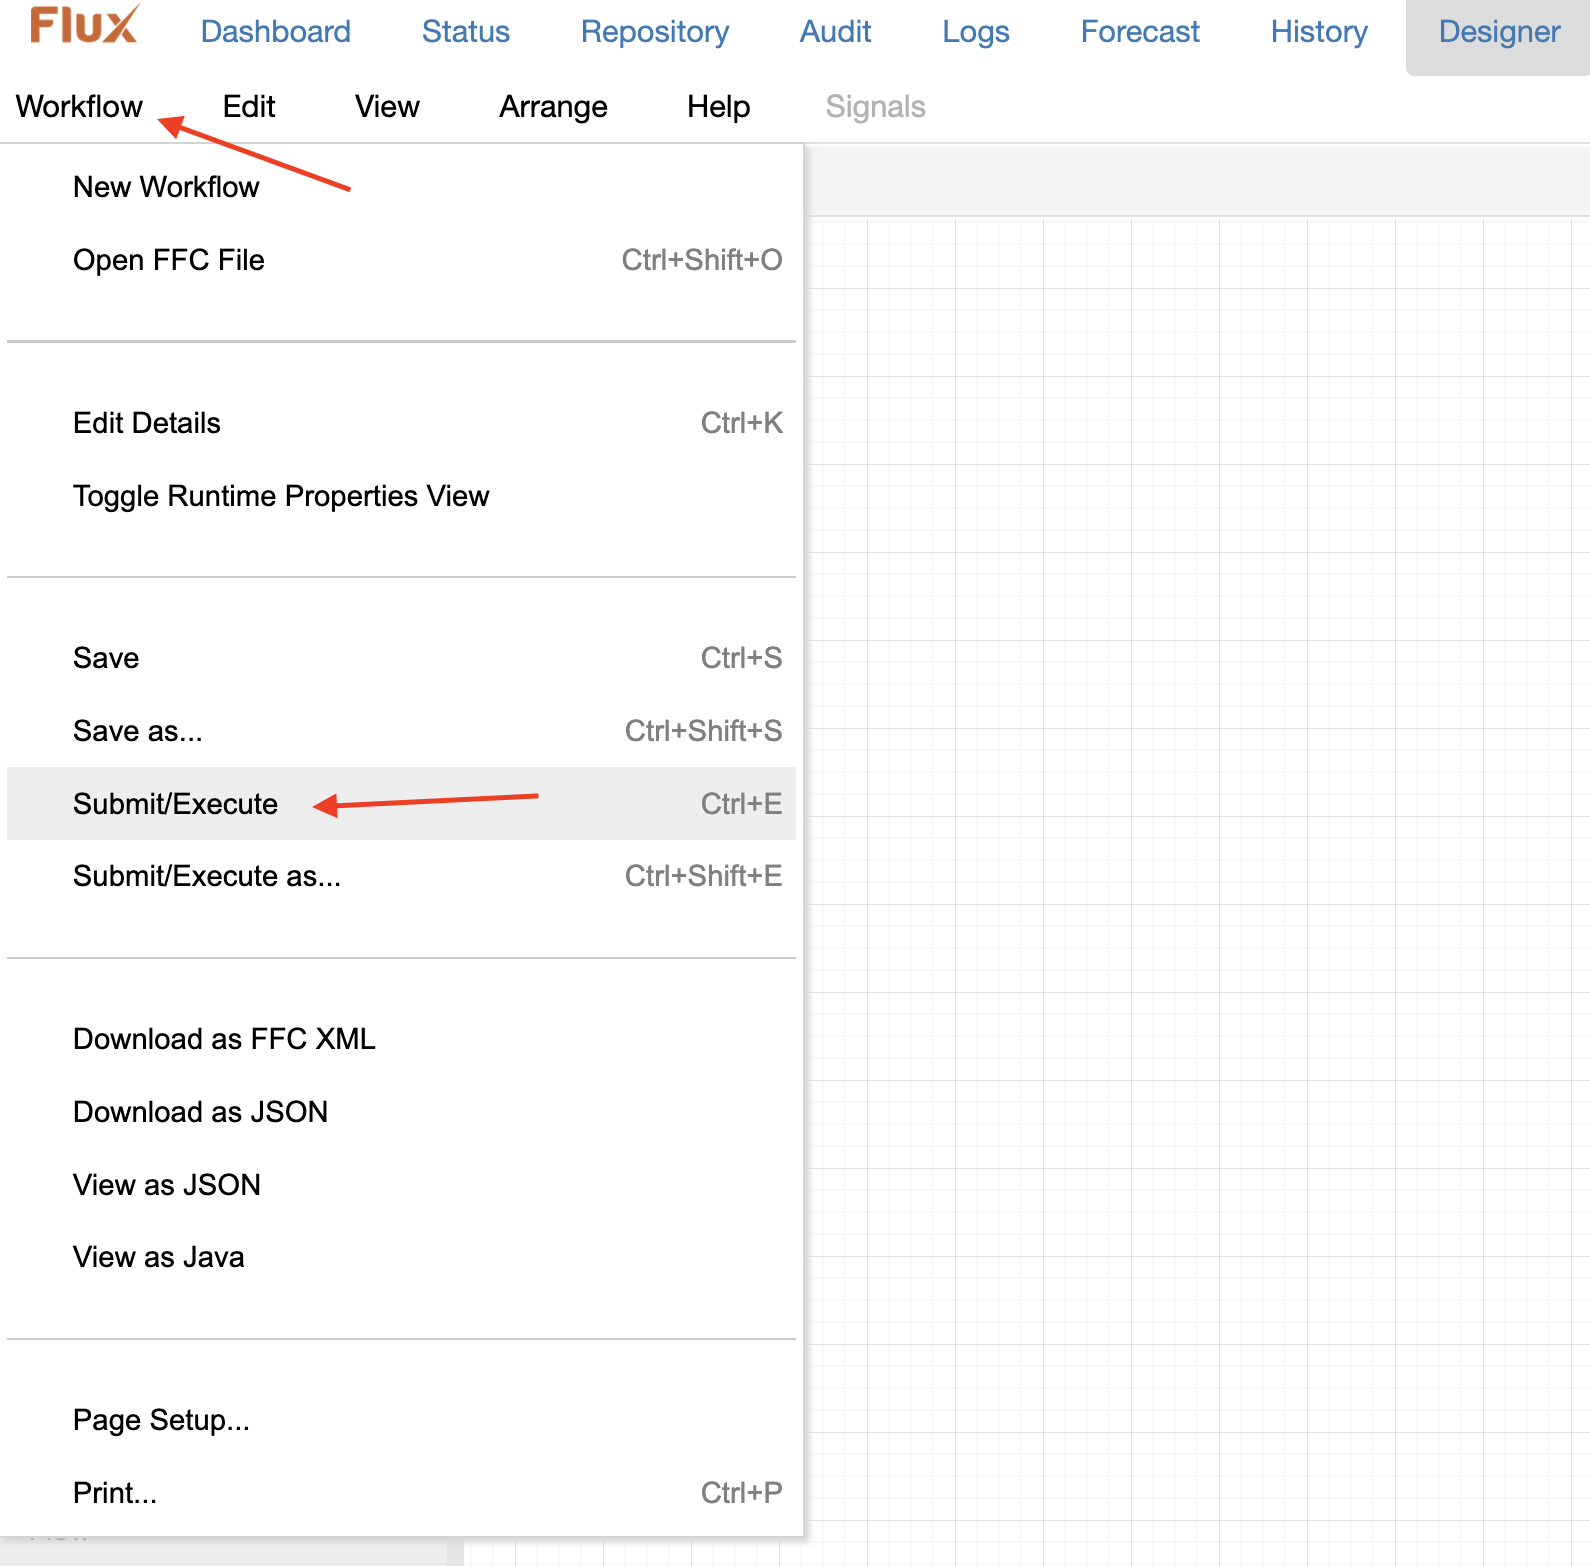
That’s it! Now just run the workflow by clicking “Submit/Execute” under the “Workflow” menu near the top-left of your screen.
If you look at the engine’s standard output now, you’ll see a subject line printed from the first email Flux located in your IMAP folder.
Once you’re confident that the Mail Trigger is configured correctly, you can add a flow back to the Mail Trigger from the Console Action as well – this loop will allow the Mail Trigger to finish processing the previous email (assuming one of the delete processed message or IMAP folder copy destination properties was set), then pick up the next message and process that as well.