FTP Command Action Example Flow Chart
The FTP Command Action allows fine grained control of what FTP commands Flux sends to an FTP, SFTP, or FTPS server. A list of commands is specified and executed sequentially, returning a list of each command’s response from the server, if any.
The following example will instruct you on how to setup an FTP Command Action that will upload, download, and rename a file. The FTP Command Action always operates from a local machine to the specified FTP, SFTP, or FTPS host.
Viewing the Example Files
Your Flux installation includes a working, pre-constructed version of this example. To load the example file:
- Click the “Repository” tab.
- Click the “Import” button.

In the dialog that appears, browse to <Flux Home>/examples/end_users/ftp_command, and select the Ftp Command.ffc file.
When the workflow finishes uploading, select it from the grid to view the workflow in the Designer.
Navigating to the Designer
The Flux Designer will be used to create and execute the example flow chart. To use the Designer, browse to the Operations Console and select the “Designer” tab.

Creating Actions
When you visit the Designer, you’ll see a blank workspace representing the new workflow. To create the example, we’ll start by populating the workflow with a few actions.
To add an action to the flow chart, left-click the action and drag it onto the Designer workspace to add it to the workflow.
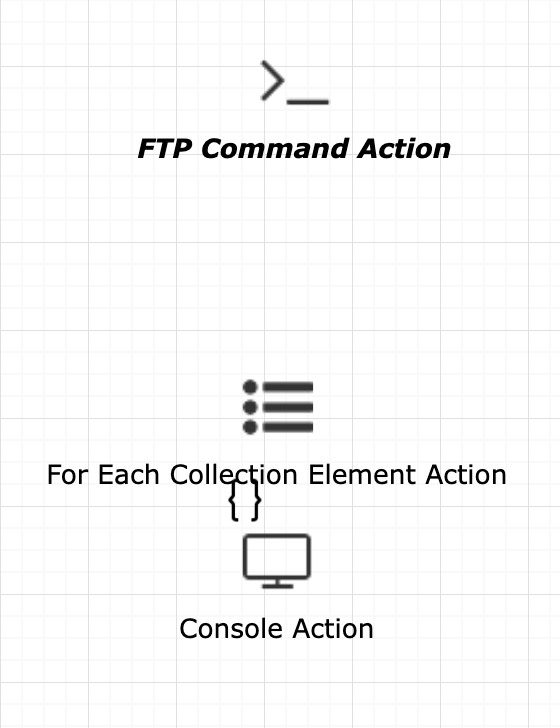
The following table contains the type, category, and quantity of each trigger and action we’ll use in this example.
| Action Type | Category | Quantity |
|---|---|---|
| FTP Command Action | File | 1 |
| Console Action | Core | 1 |
| For Each Collection Element Action | Flow | 1 |
Once you’ve added the actions, your workspace will look like this:
Setting up Flows
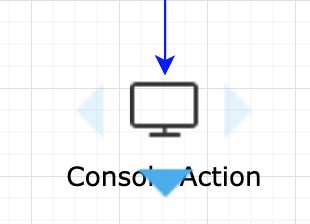
Using the image below as a guide, create flows between the actions. To create a flow:
-
Hover over the action to show a set of 4 blue arrows.
-
Click and hold the left mouse button on the blue arrow of the action you wish to draw the flow from.
-
Drag your cursor to the action you wish to draw the flow to and release.

Editing Action Properties
FTP Command Action
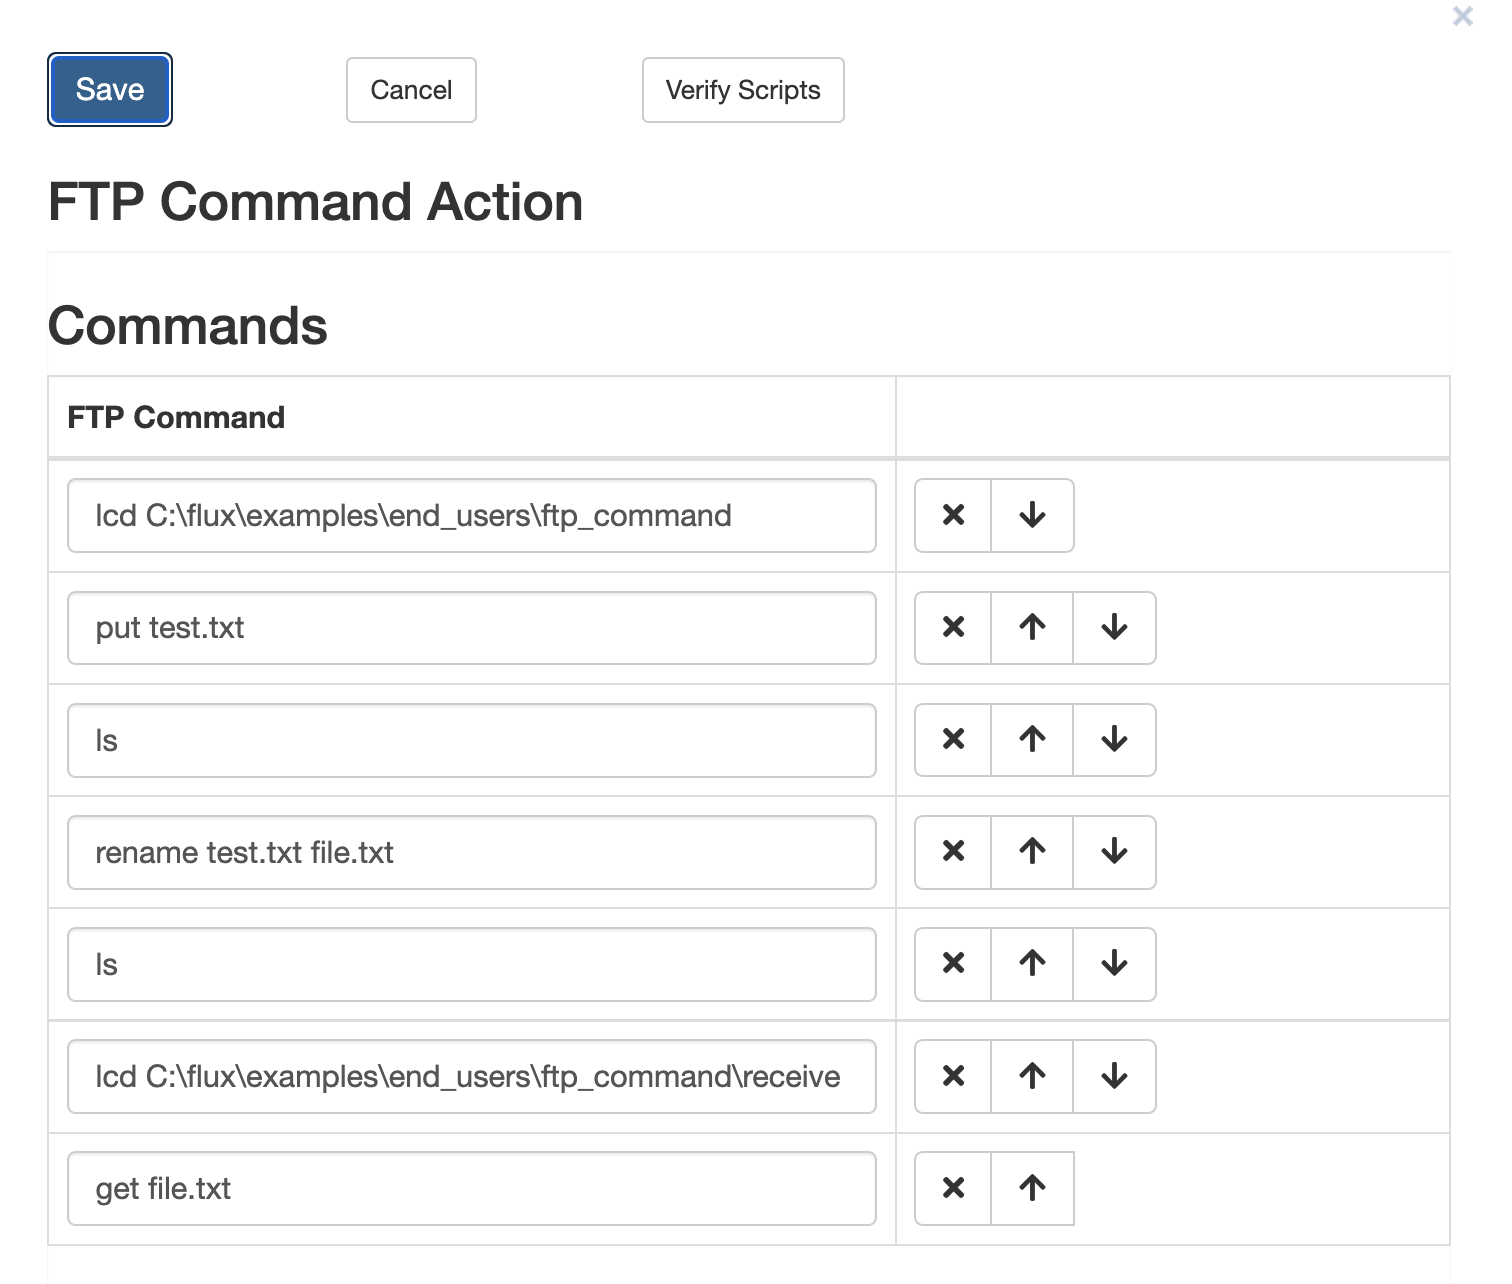
Double-click the FTP Command Action to open its action properties panel. Find the commands property — this property will list the commands that the action will execute against the FTP server.
To add new commands, click the “+ FTP Command” button and a new text box will appear, allowing you to enter the command. Add the following commands to the action:
- lcd C:\ <flux installation directory>\examples\end_users\ftp_command
- put test.txt
- ls
- rename test.txt file.txt
- ls
- lcd C:\ <flux installation directory>\examples\end_users\ftp_command\receive
- get file.txt
The “lcd” command will change your local working directory to the value you specify. Point it to the directory this example resides in. The “put” command will upload the test.txt file to the FTP server. The “ls” command will provide proof that the put command was successful by listing the test.txt file in the results. The “rename” command will rename the file to file.txt. The “ls” command, issued again, will show in the results that the file was in fact renamed to file.txt. The next “lcd” command changes the local directory in preparation to receive the new file. Finally, the “get” command downloads the newly renamed file back onto the local machine.
When you’re done, the editor window will look something like this:
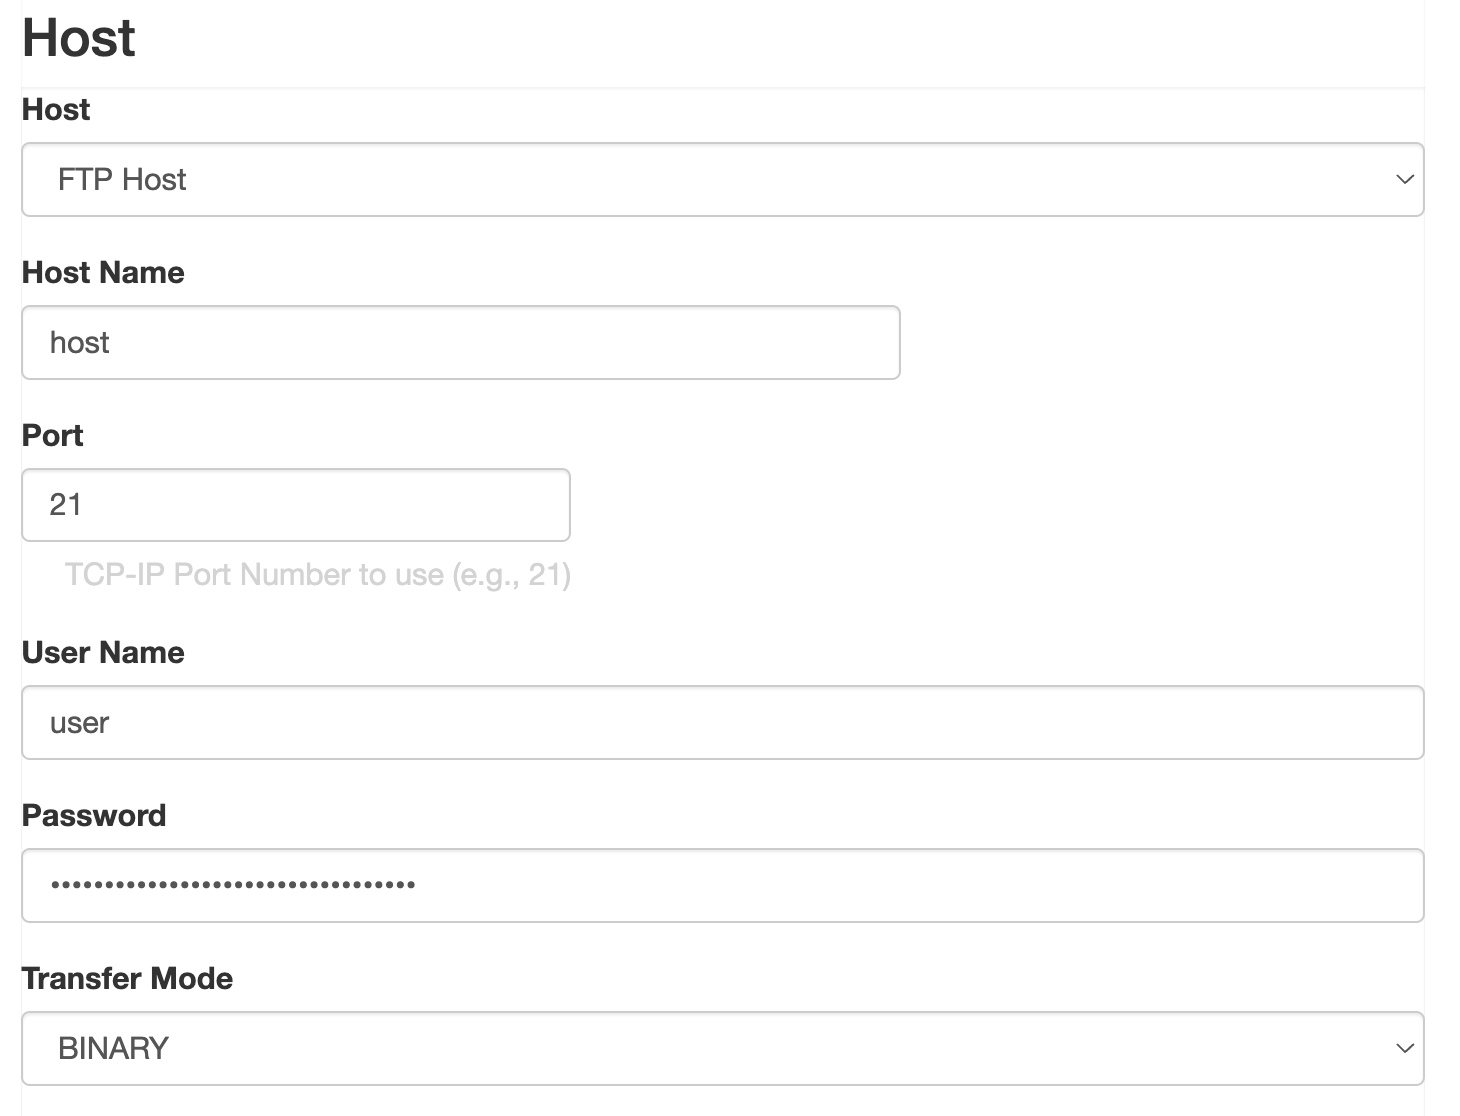
Next, we will need to set a host for the FTP Command Action to connect to and issue the specified commands. Any FTP, SFTP, or FTPS server you have available that is accessible from the machine you are running Flux on will work for this action. If you do not have a server available you can download a number of different FTP servers from the internet. There are also many sites that allow you to register and use their remote file transfer servers.
Once you have a reachable file transfer server with valid credentials, go into the Flux designer and edit the “Host” action property of the FTP Command Action. Select the type of hose you are connecting to using the drop-down menu under the “Host” heading. Fill in the “Host name”, “User Name”, and “Password” fields with the appropriate information. You may also modify the “Port” field if the server you are connecting to is not listening on a default port. The figure below shows the “Host” section.
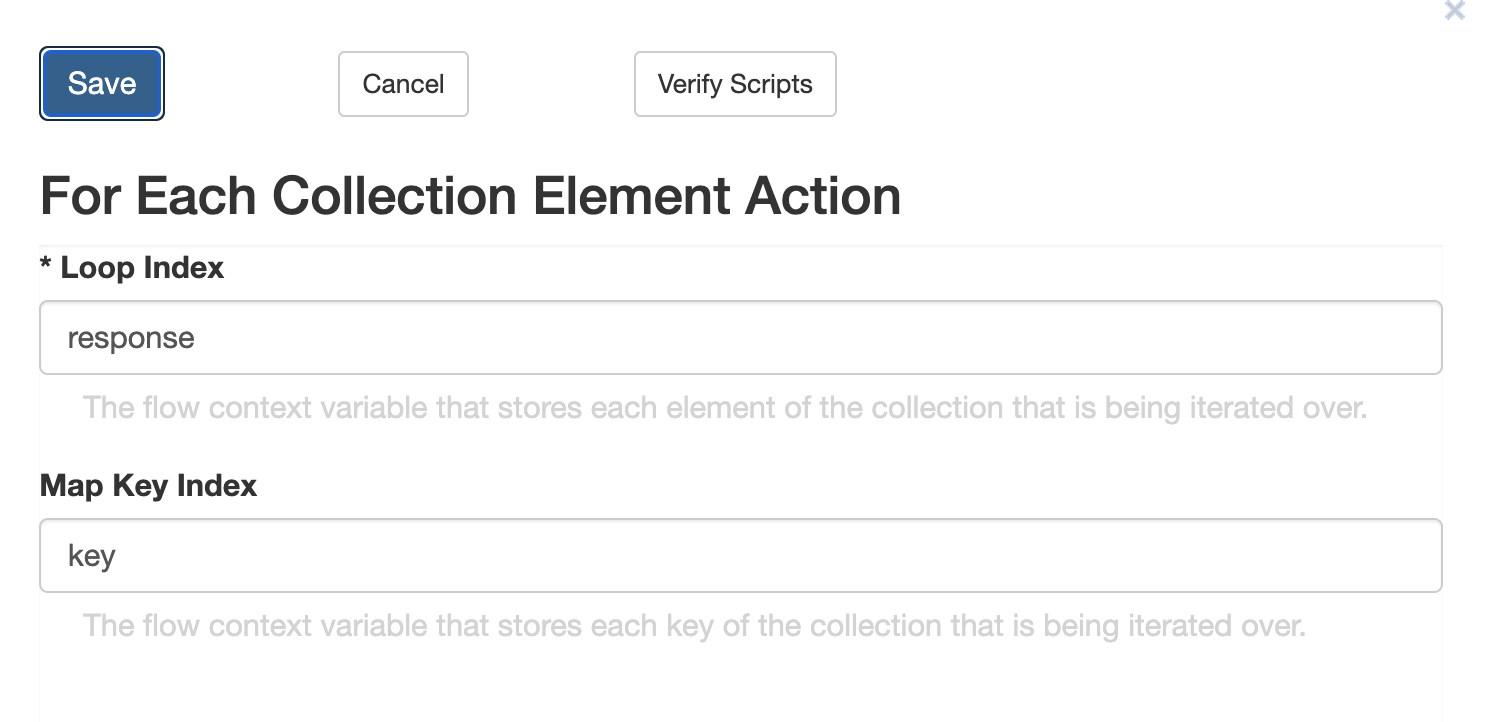
For Each Collection Element Action
The For Each Collection Element Action will take the returned result from the FTP Command Action and iterate through each response. We need to set the “Loop Index” action property of the For Each Collection Element Action to “response”. Do this by double-clicking the For Each Collection Element Action in the canvas and editing the “Loop Index” property.
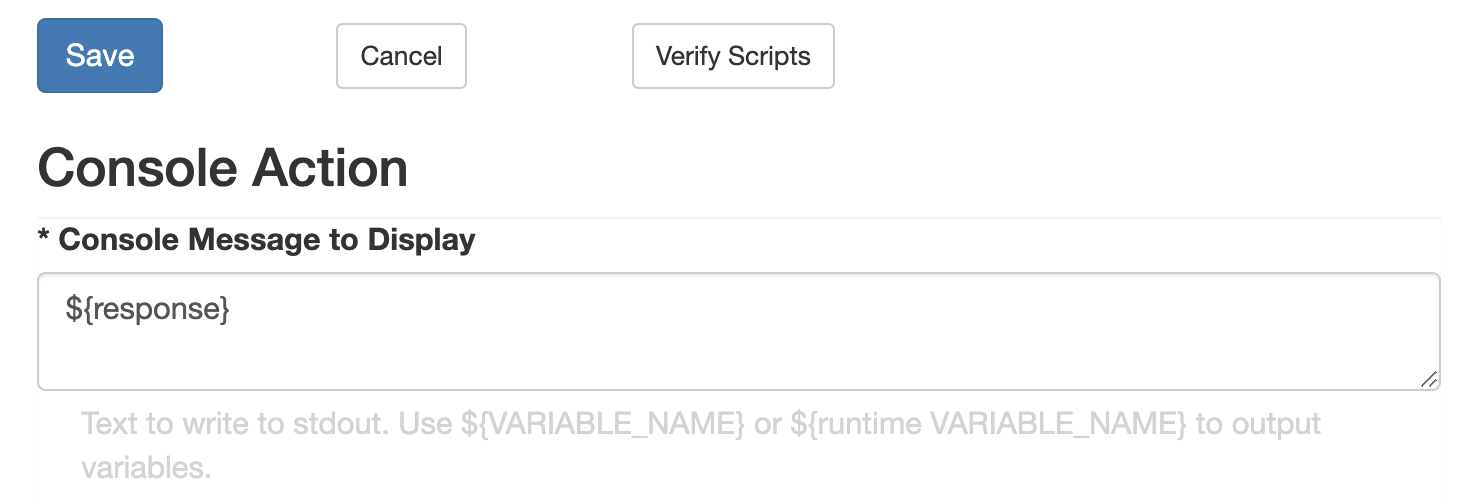
Console Action
Edit the Console Action “Message” action property to read ${response}. This finds the For Each Collection Element Action’s value within that loop iteration and uses it as the Console Action’s message.
Editing Flows
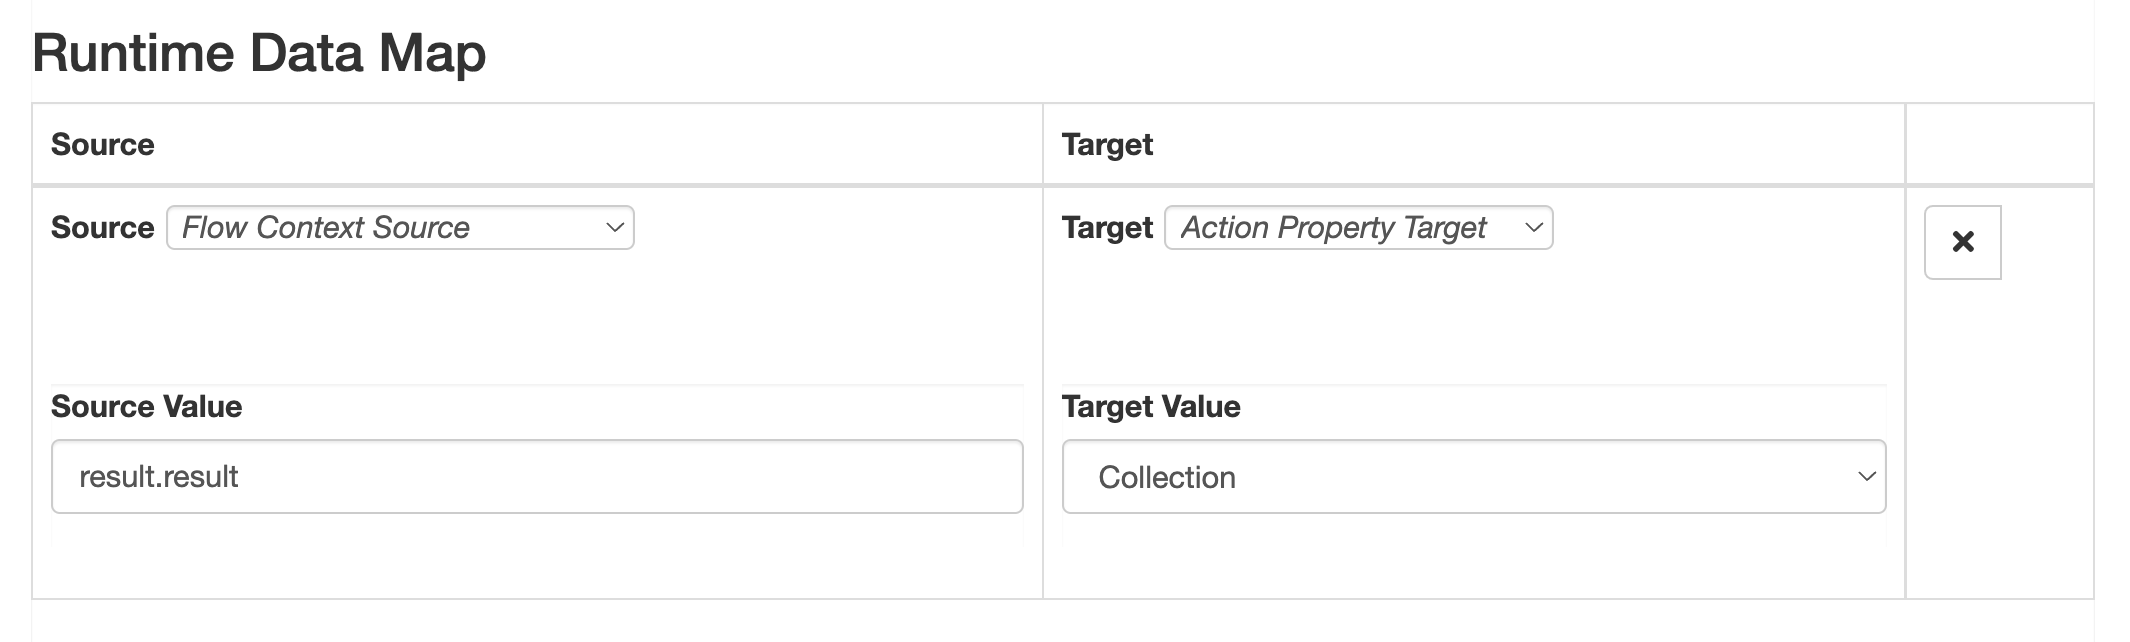
Next, we need to add a runtime data map onto the flow out of the FTP Command Action. You can do this by double-clicking the flow out of the FTP Command Action and clicking the “+ Mapping” button under the “Runtime Data Map” heading.
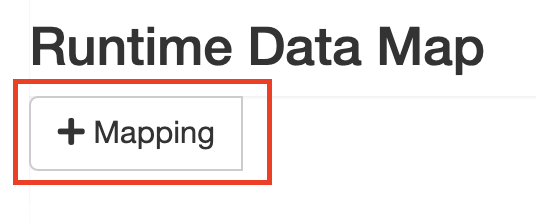
This will bring up the runtime data map editor. Make sure the source type is from the “Flow Context Source” and the target type is from the “Action Property Target”. Next edit the “Source Value” field of the source data map to read “result.result” and the target “Target Name” field to use the “Collection” property. The figure below illustrates the runtime data map.
With that change, the flow chart is complete and ready to export to the engine.
Running the Flow Chart
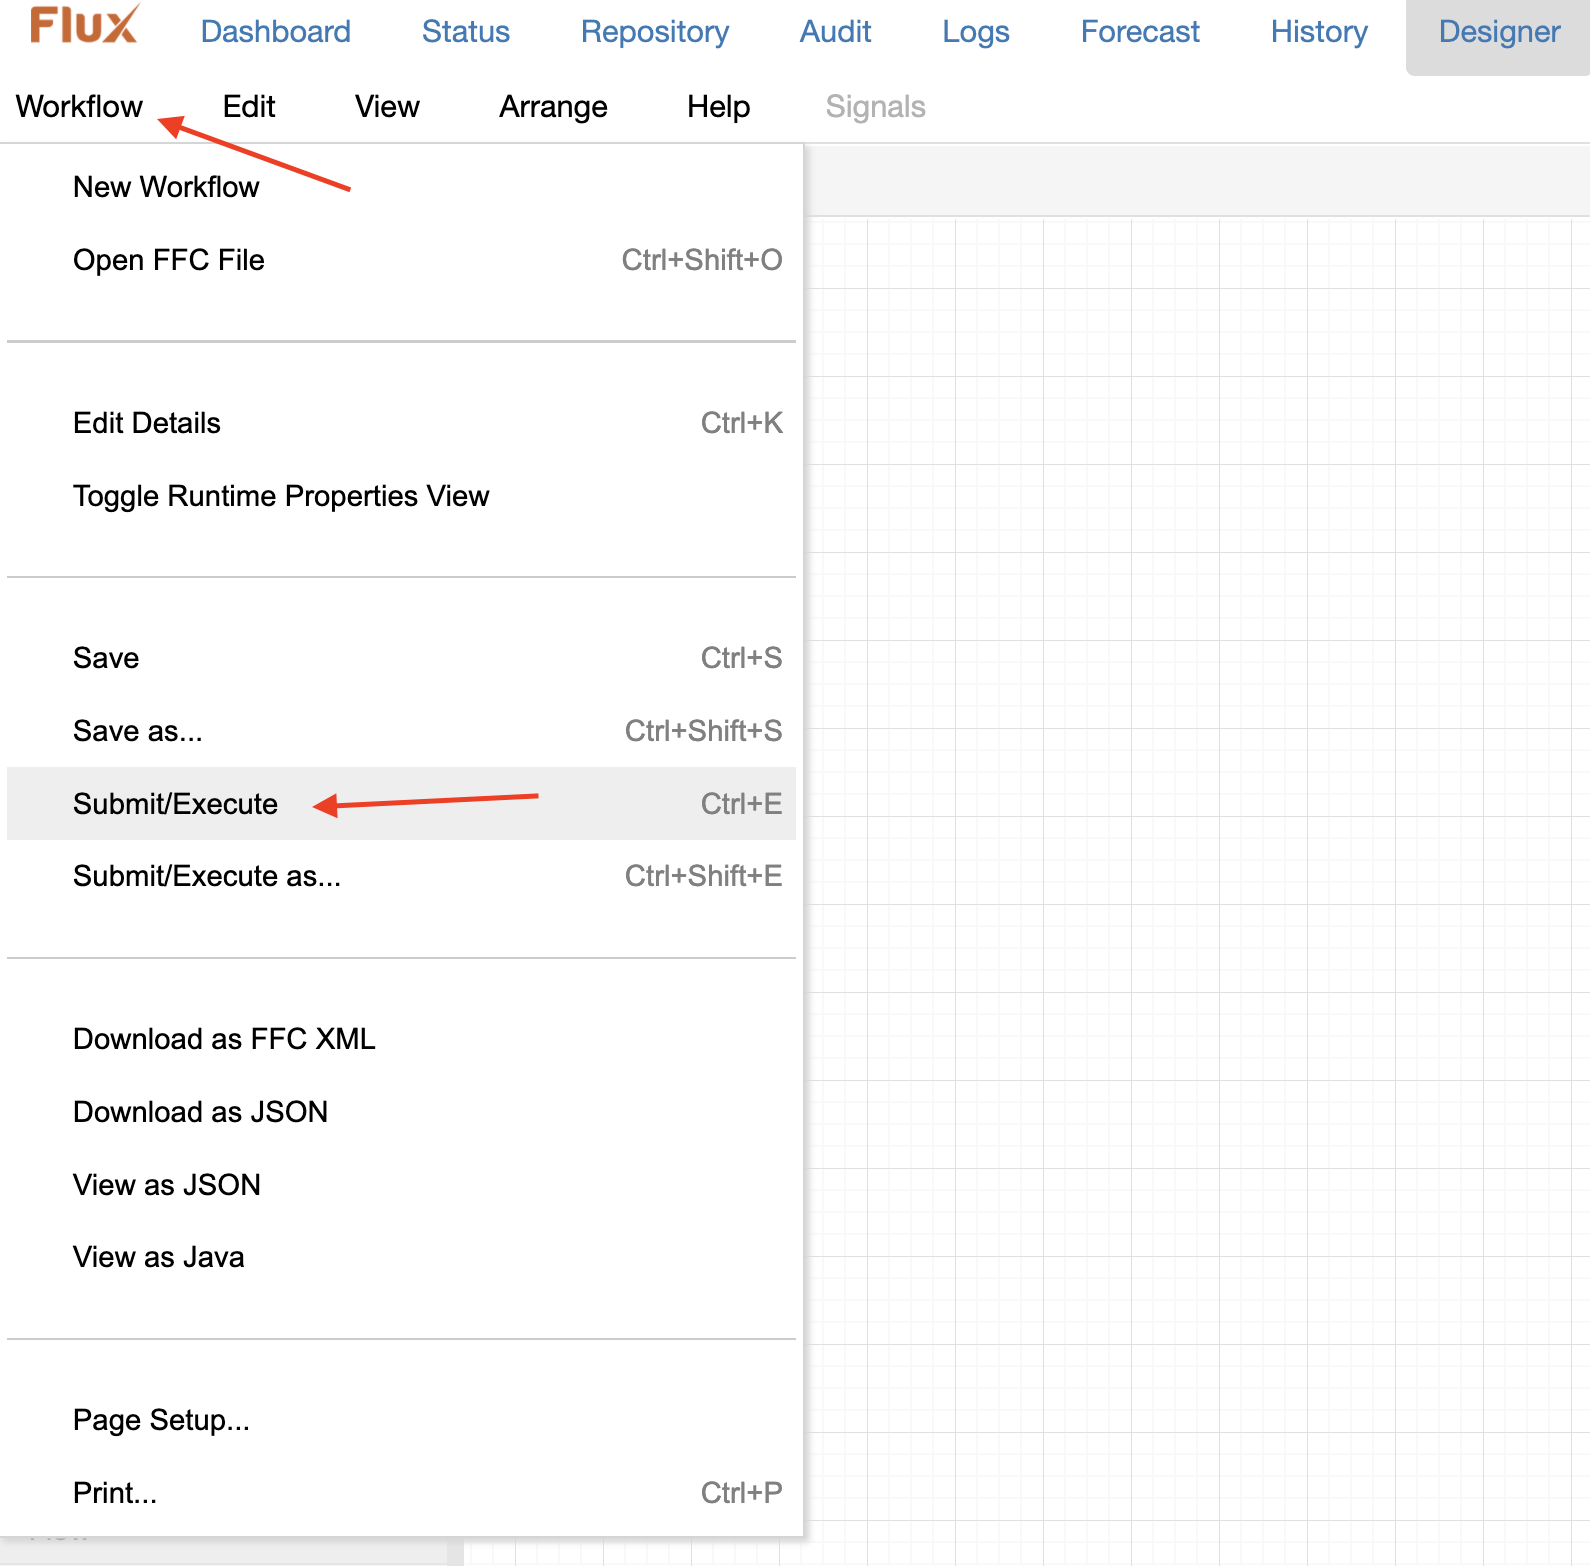
Next, export your flow chart to the engine. This can be accomplished by hovering your mouse over the “Workflow” button near the top left of your screen, then clicking the “Submit/Execute” button. You can also use the keyboard shortcut, Ctrl+E.
A confirmation window will appear if the job was successfully exported. If there is an error message, look over this example carefully, and correct any mistakes made.
If you look at your engine’s console, you should see the listing from your server showing the uploaded, then renamed file on two separate lines (along with any other files present in the user’s home directory when the example was run).