Process Action Example Workflow
This example describes how to process files individually using a process action’s “Command Properties” field. This example will also guide you through the steps of setting up a process action to run a program.
In the example, we’ll create a file trigger that watches for .txt files in a specific directory. Once the files are found, they’ll be passed into a for each collection element action that will iterate through each file, one at a time. As each file name is passed into the process action, it will be used as an argument for the process action’s command. Once the list of files is exhausted, an else flow will complete the workflow.
Viewing the Example Files
Your Flux installation includes a working, pre-constructed version of this example. To load the example file:
- Click the “Repository” tab.
- Click the “Import” button.

In the dialog that appears, browse to <Flux Home>/examples/end_users/process_action, and select the .ffc file located there.
When the workflow finishes uploading, select it from the grid and choose the “Edit” button to view the workflow in the Designer.
Navigating to the Designer
The Flux Designer will be used to create and execute the example workflow. To use the Designer, browse to the Operations Console and select the “Designer” tab.

Creating Actions
When you visit the Designer, you’ll see a blank workspace representing the new workflow. To create the example, we’ll start by populating the workflow with a few actions.
To add an action to the workflow, left-click the action and drag it onto the Designer workspace to add it to the workflow.
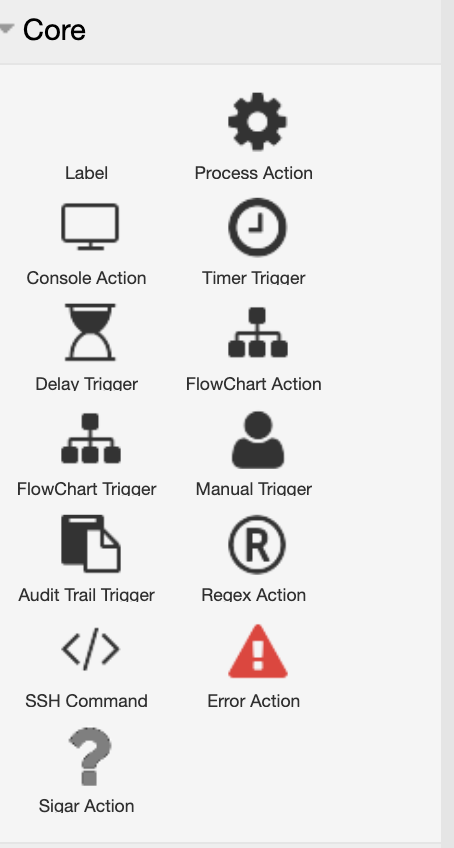
The following table contains the type, category, and quantity of each trigger and action we’ll use in this example.
| Action Type | Category | Quantity |
|---|---|---|
| File Exist Trigger | File | 1 |
| Console Action | Core | 2 |
| Process Action | Core | 1 |
| For Each Collection Element Action | Workflow | 1 |
Setting up Flows
Using the image below as a guide, create flows between the actions. To create a flow:
-
Hover your mouse over the action you want to draw a flow from and you’ll see four blue arrows appear.
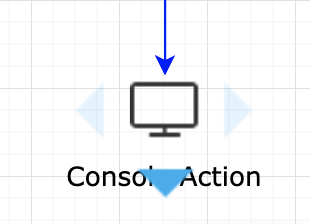
- Click and hold the left mouse button on the arrow you wish to draw the flow from.
- Drag your cursor to the action you wish to draw the flow to and release.
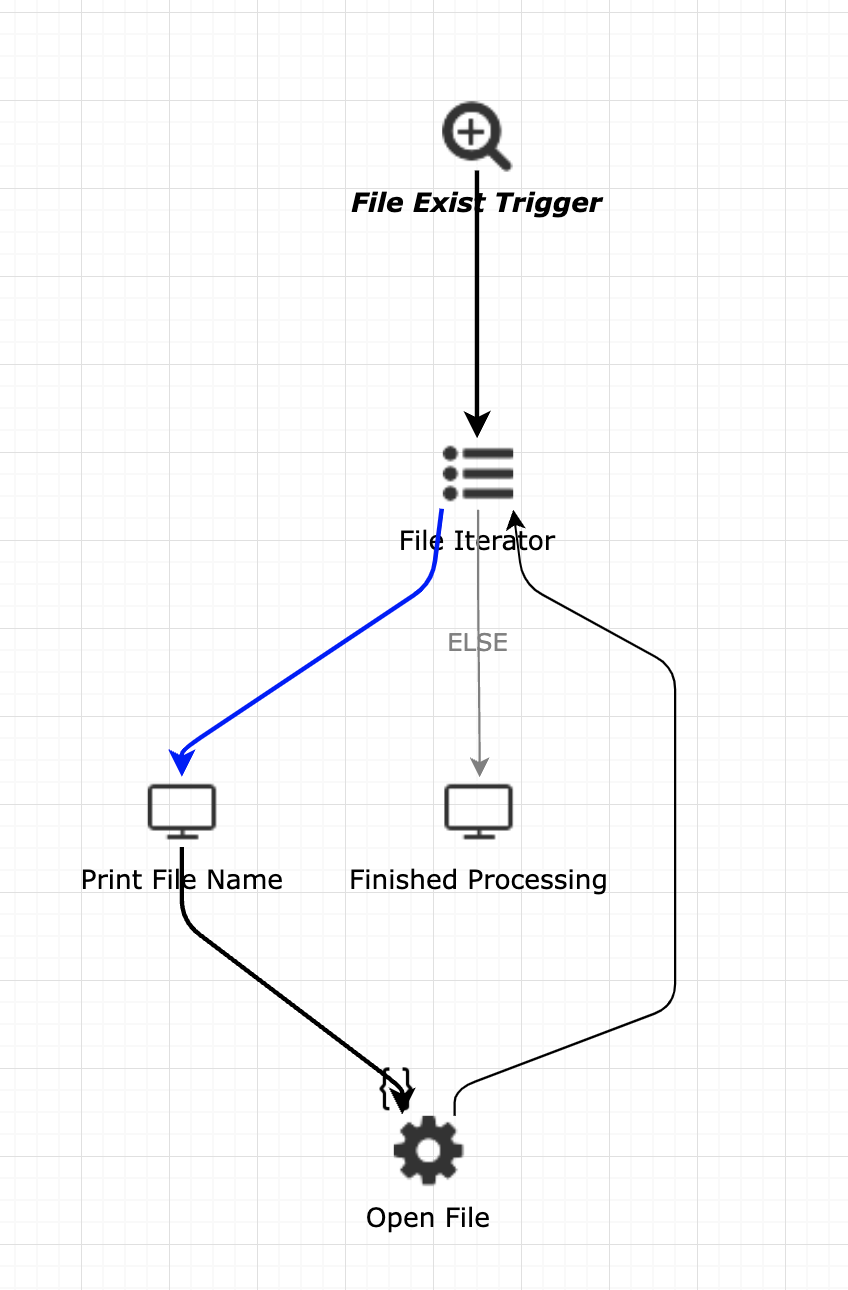
Now, we’ll need to make some changes to perform data mapping to print our results and to set up the else flow (shown in the image above).
-
Double-click the flow from the For Each Action to the Finished Processing Console Action. Change the “Flow Type and properties” to “Else”.

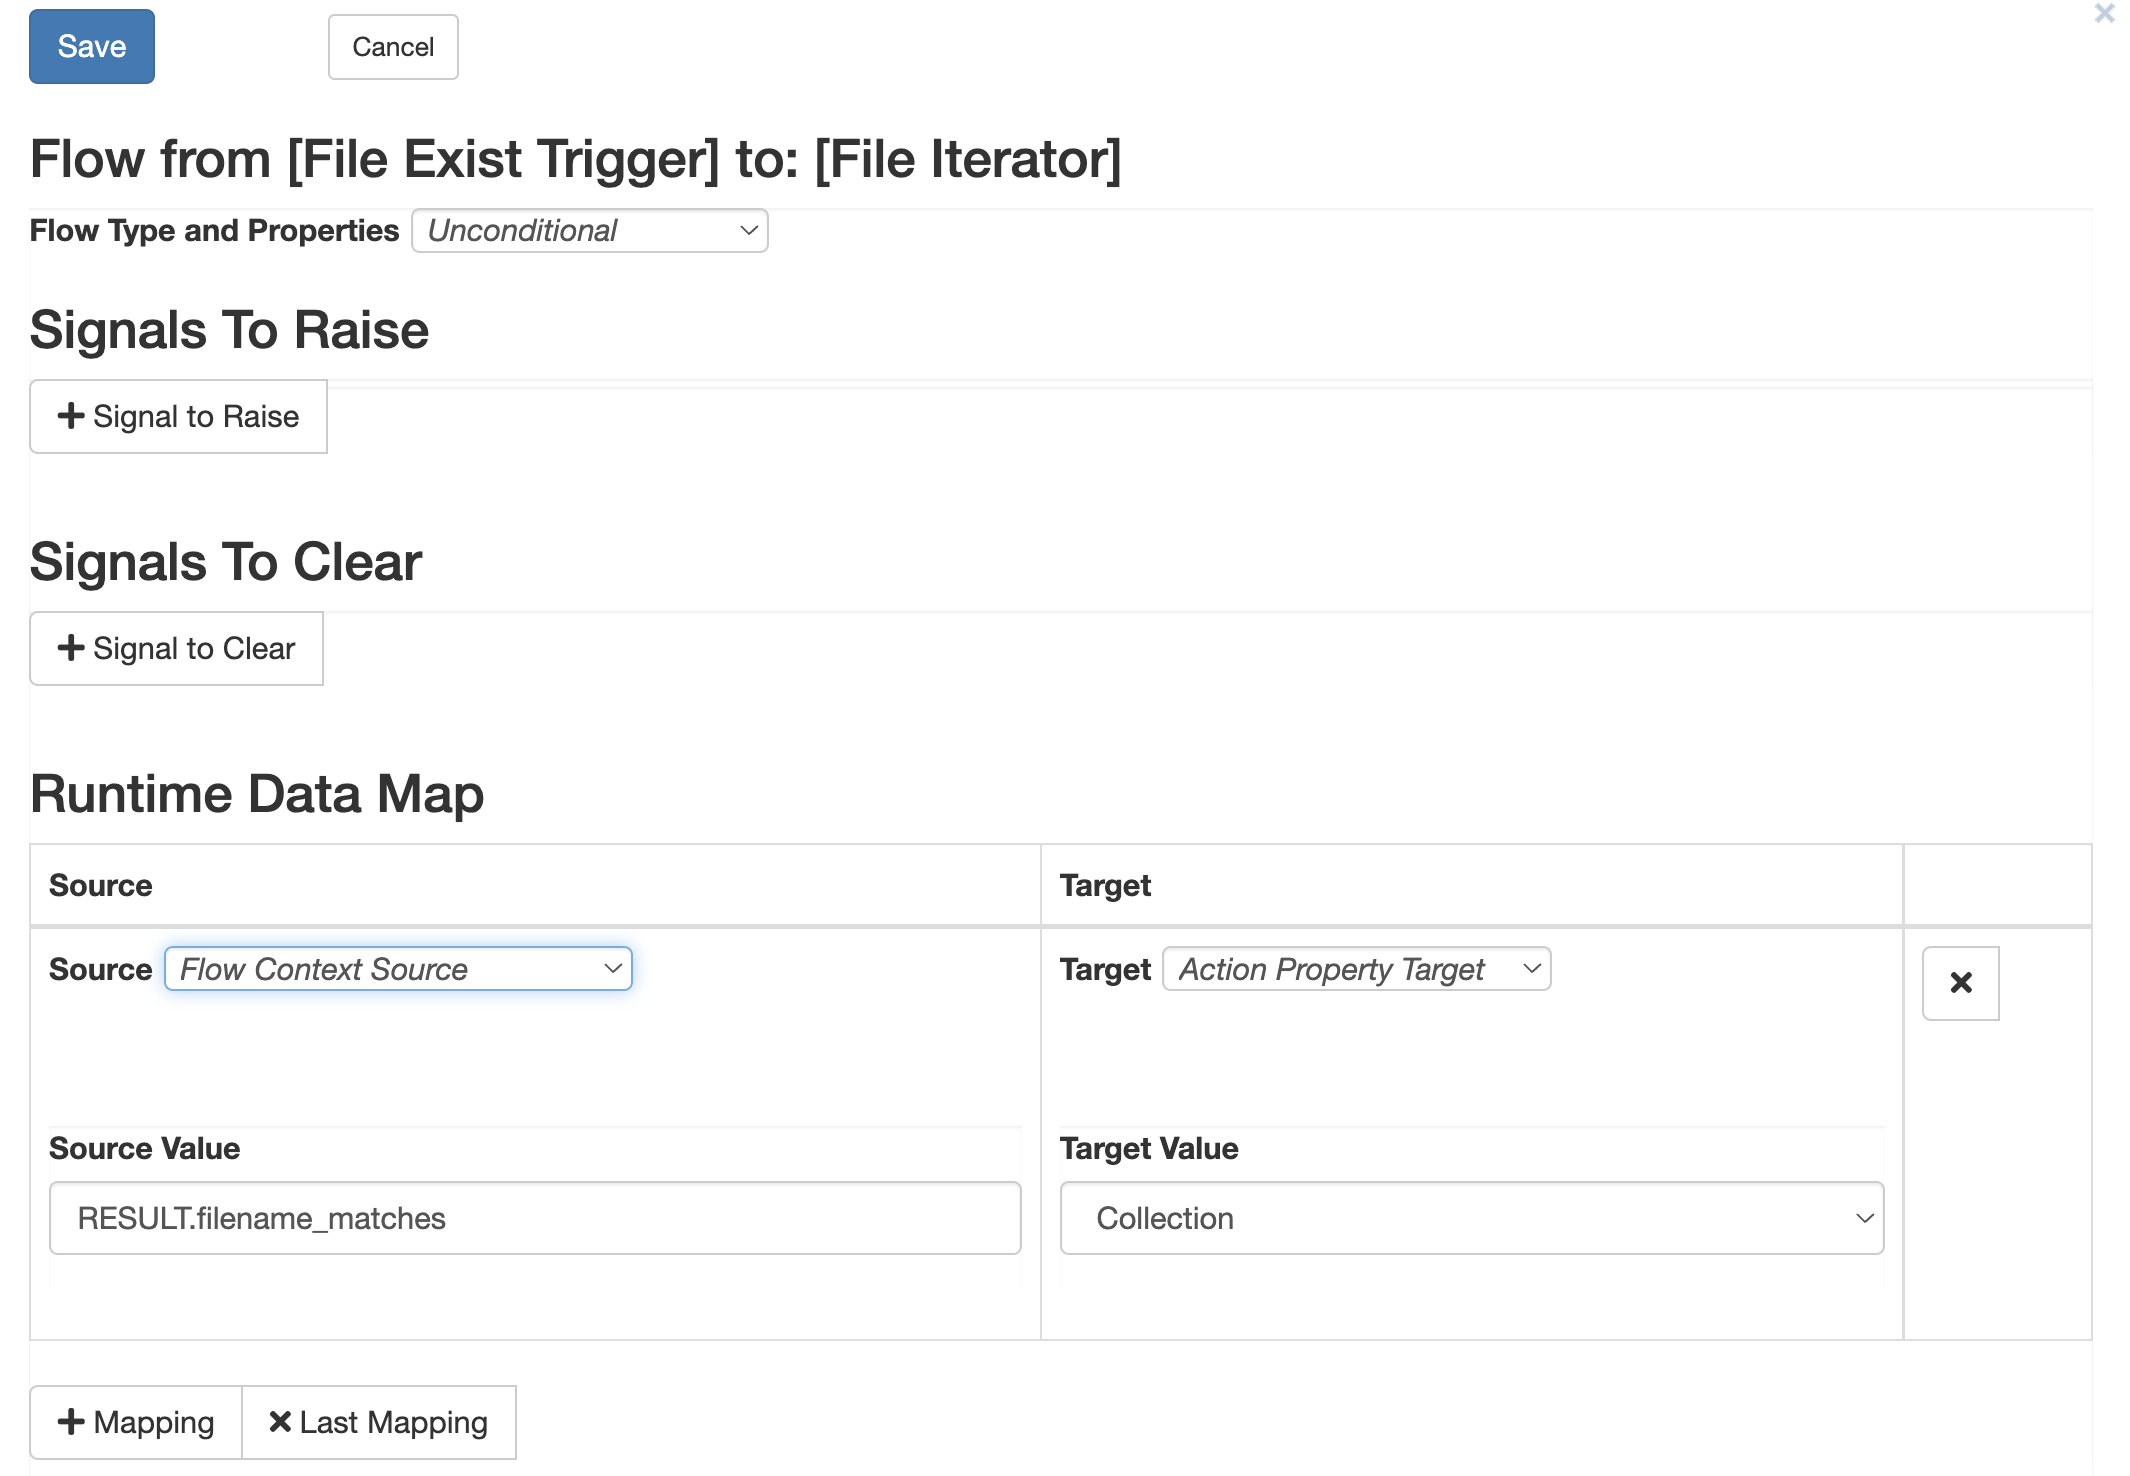
- Double-click the flow from the File Exist Trigger to the For Each Action (named File Iterator in the screenshot).
- In the Runtime Data Map field, click the “+”. Enter “RESULT.filename_matches” for the Source Value.
- In the drop-down menu next to the target, select “Action Property Target”.
- The “Target Value” field will change to a drop-down menu. Choose “Collection” from the menu.
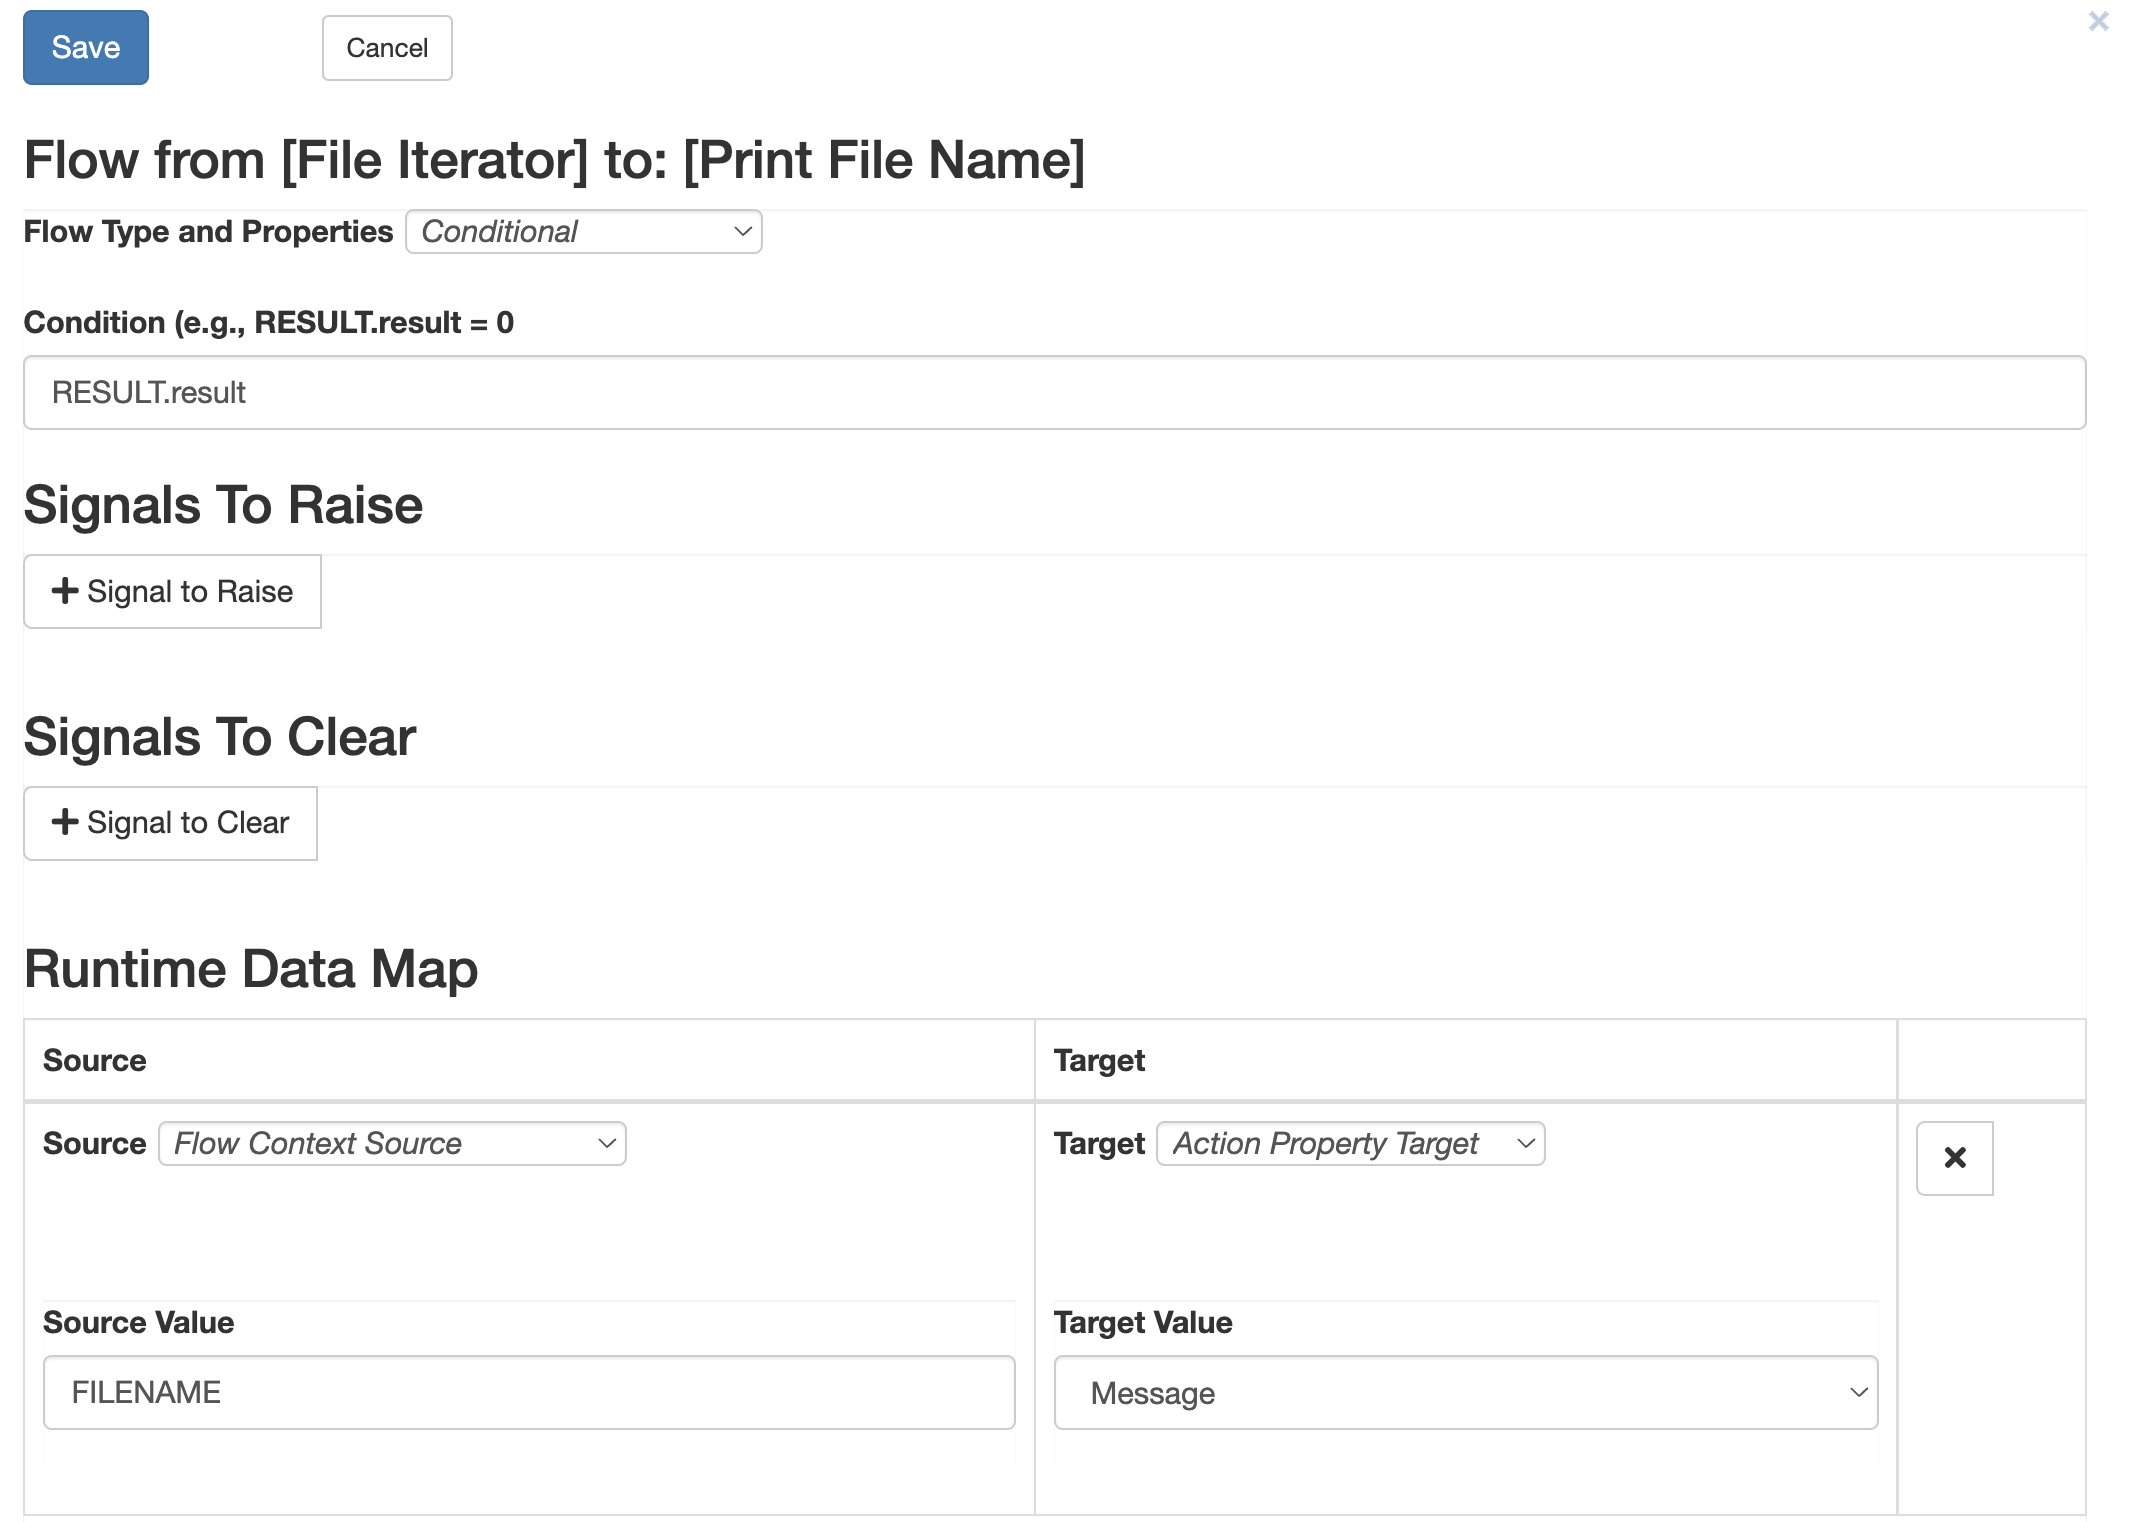
- Repeat the process for the flow from the For Each Action (named File Iterator) to the Console action (named Print File Name).
- Click the “+” button under the Runtime Data Map. In the “Source Value” field, enter “FILENAME”.
- For the target, choose “Action Property Target”.
- In the drop-down menu, select “Message”
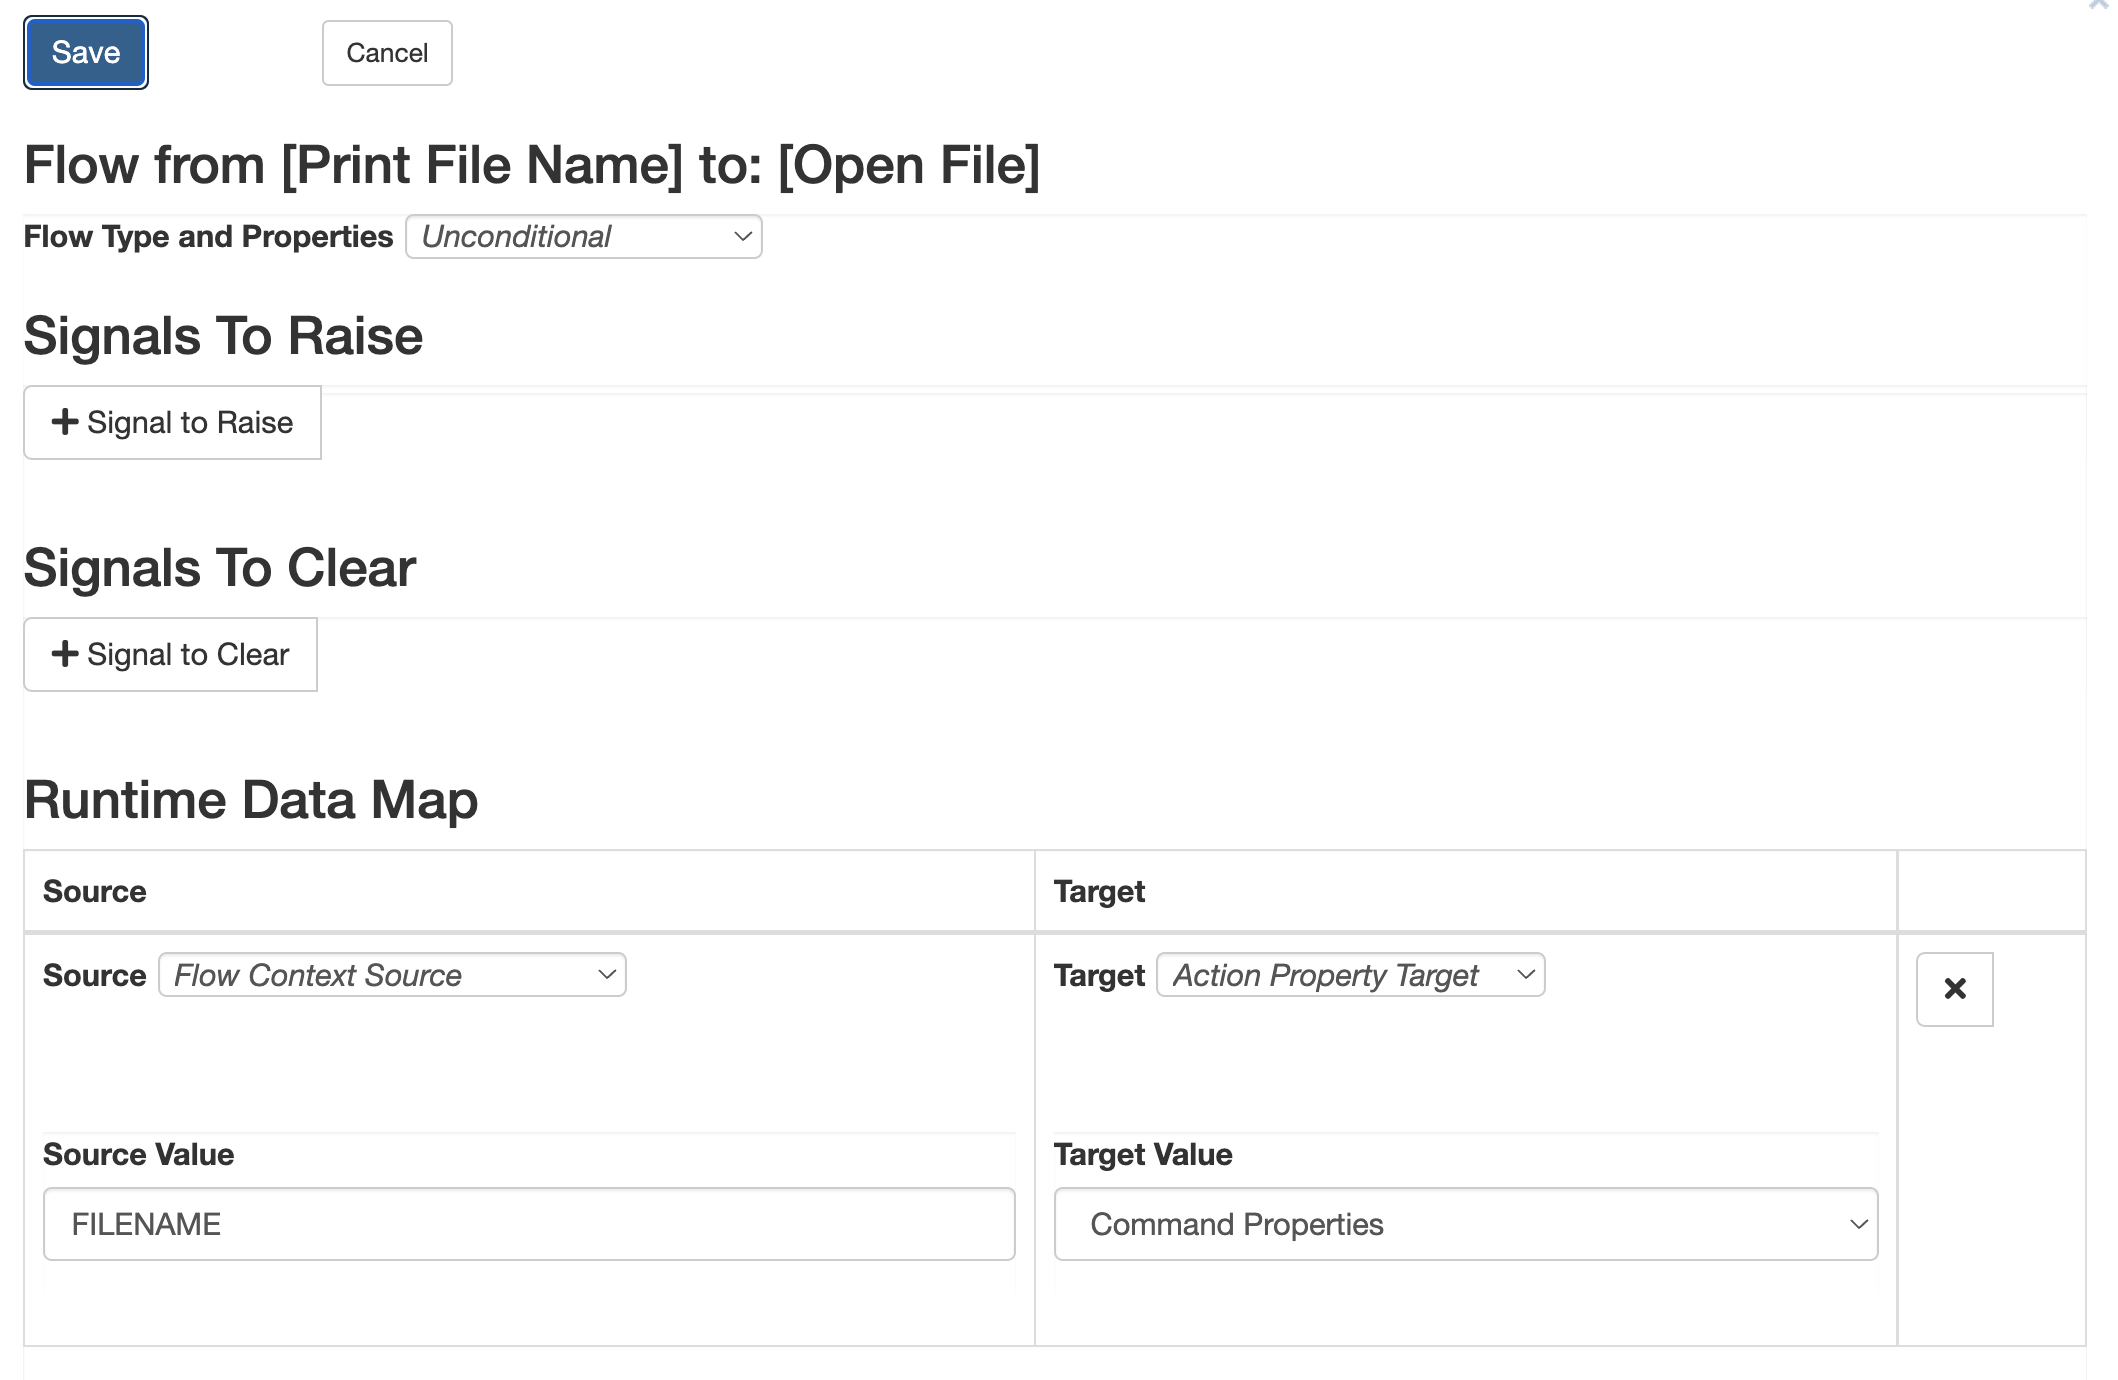
- Add a runtime data map to the flow from the console action (Print File Name) to the process action (Open File).
- Click the “+” button under the Runtime Data Map heading. For the “Source Value”, enter “FILENAME” again.
- For the target, set the type to “Action Property Target”.
- Select the “Command Properties” option for the target.
Editing Action Properties
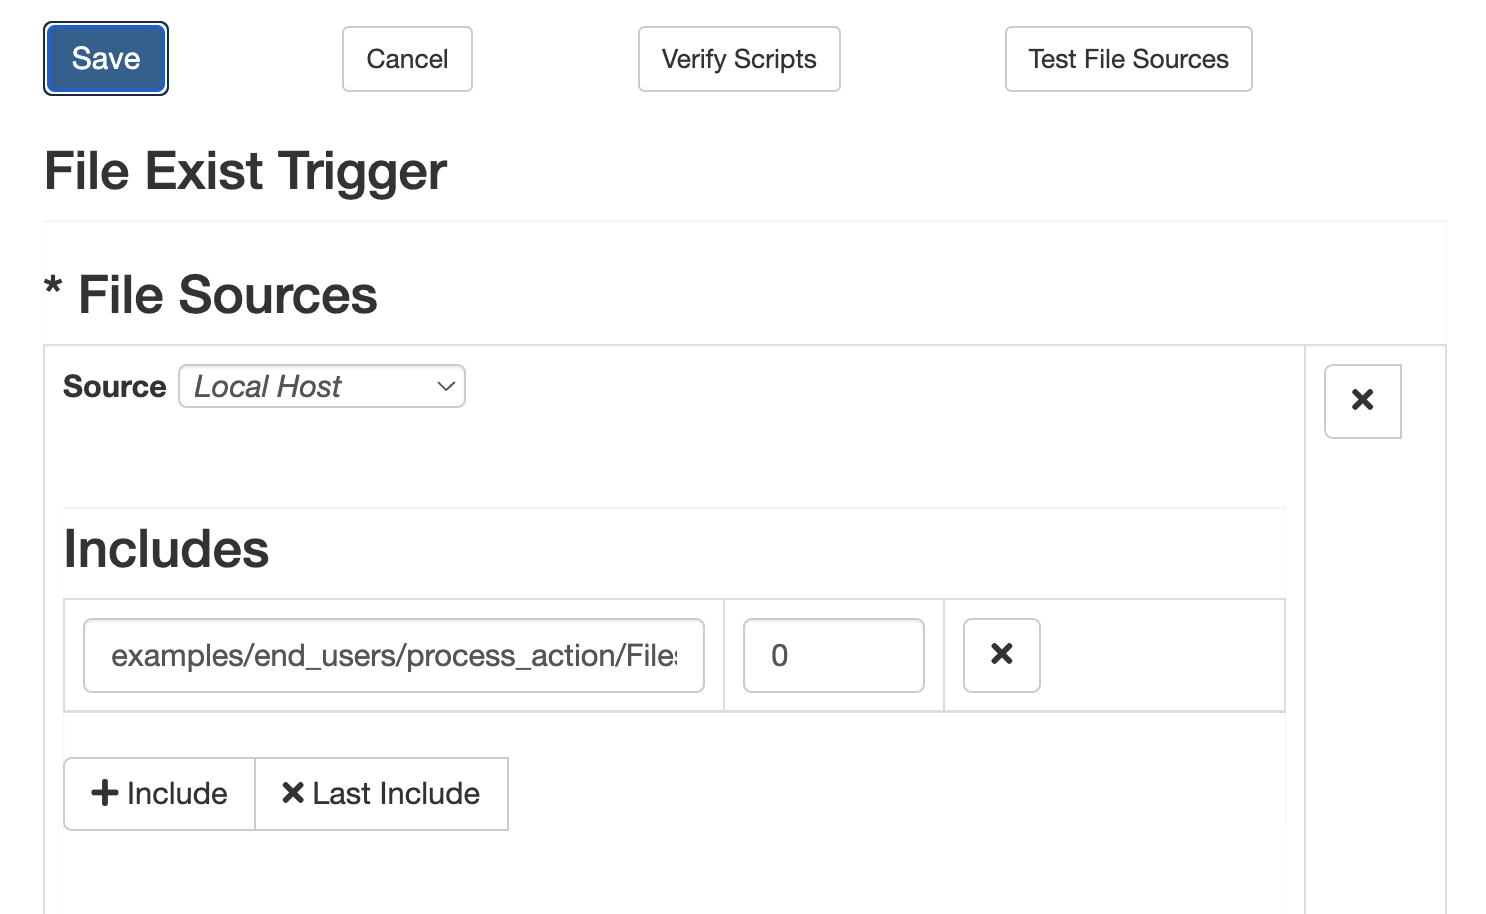
File Exist Trigger
Double-click the trigger to open its action properties. Click the “+” icon under the File Sources heading. Set the “Source” to be Local Host”. Then click the “+” button under the Includes heading to bring up a text box where you can enter the path:
_examples/end_users/process_action/Files to be Processed/*.txt_
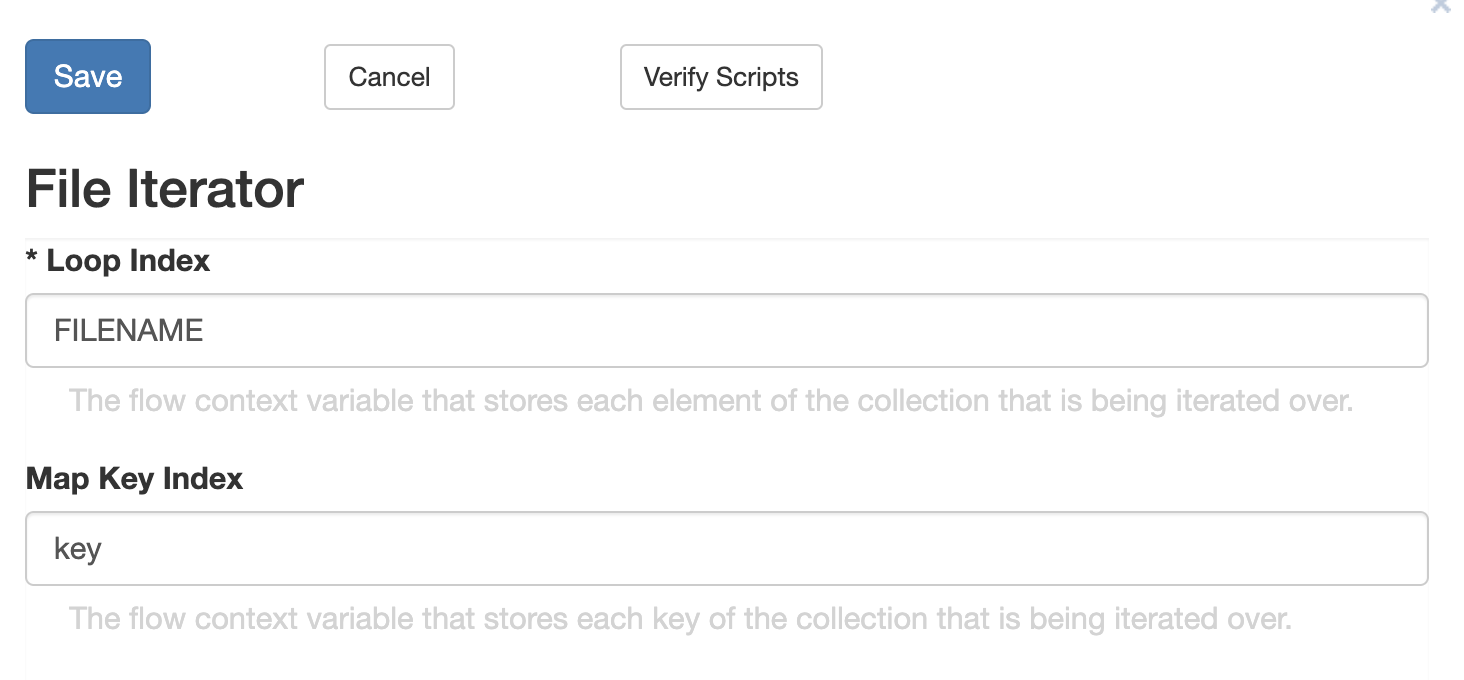
For Each Collection Element Action (File Iterator)
Set the loop index to “FILENAME”. This property determines the name of the variable that will store the current element collection at runtime — when the action runs, it will place the current file into the variable “FILENAME”.
Console Action
Set the “Message” property of the console action to read “Processing is complete”.
Process Action
Finally, we’ll need to configure the process action to run using the file names we pass in. Edit the command field to read “cmd /c ${FILENAME}”. This will open the system command shell and run the file name passed in from the “FILENAME” variable.
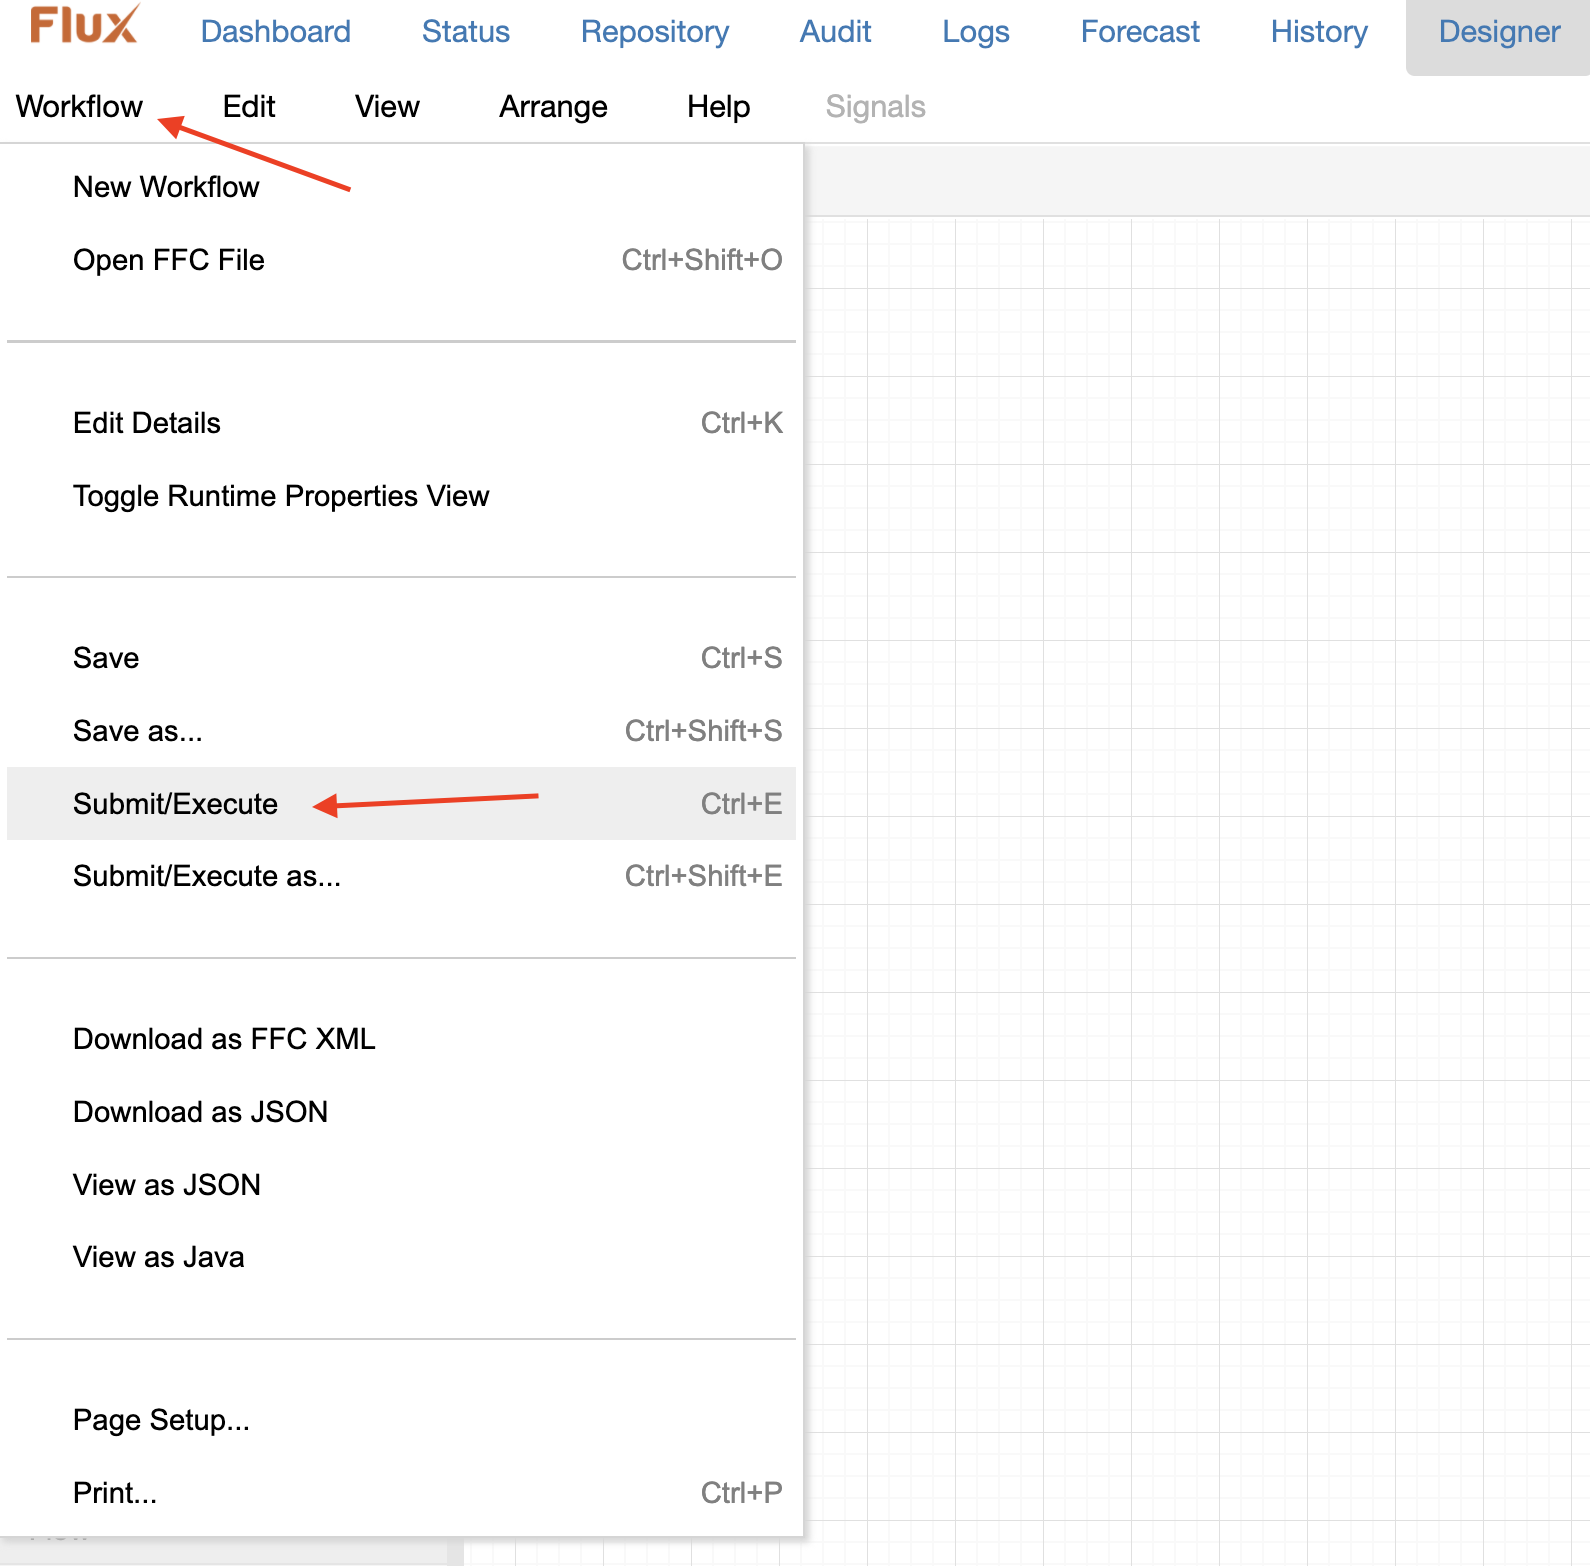
Running the Workflow
Finally, hover over the “Workflow” tab near the top left of your screen and click “Submit/Execute”. Or you can use the keyboard shortcut, Ctrl+E. This will start the workflow.
Your workflow should now be running. If you watch the command prompt your engine is running on you will see the first name of the first file in the “Files to be Processed” directory. After the file name is displayed on your command prompt a “.txt” file will open on your machine. Edit this file if you wish, and then exit out. The workflow then moves onto the second file to be processed. The file name is printed out on your console and the file opens for editing. If you exit this file the same will happen with the next file. This behavior continues until all files have been processed in the specified directory, then the Else flow is followed and the workflow ends.