Java Action Example Workflow
This example highlights the steps involved in creating and configuring a Java Action to run inside a workflow. For users proficient in java programming, these actions may be useful when a certain amount of work needs to be completed in java code before continuing flow into another action.
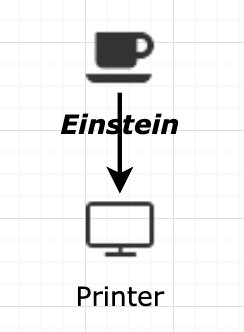
For this example, a Flux Java Action (Einstein) is used to calculate the sum of PI (˜3.14) and E (˜2.72). This calculation is done inside the Java Action listener “MyJavaListener”. The result of this calculation is then put into the flow context for the proceeding Console Action (Printer) to display the result on the console.
Running this Example from the Example .ffc File
To get started, login to the Flux Operations Console and head to the Repository tab.
Click on ‘Import’ to upload the example to the Repository.

When the file browser displays, navigate to ‘/examples/end_users/java_action’ inside your Flux installation folder and select the file named ‘Java Action.ffc’ that’s located in the Java Action’s example folder. After clicking ‘Open’ on the file browser window, the workflow will be uploaded to the Repository.
You can now select the Java Action example workflow from the Repository and edit the workflow in the web-based designer.
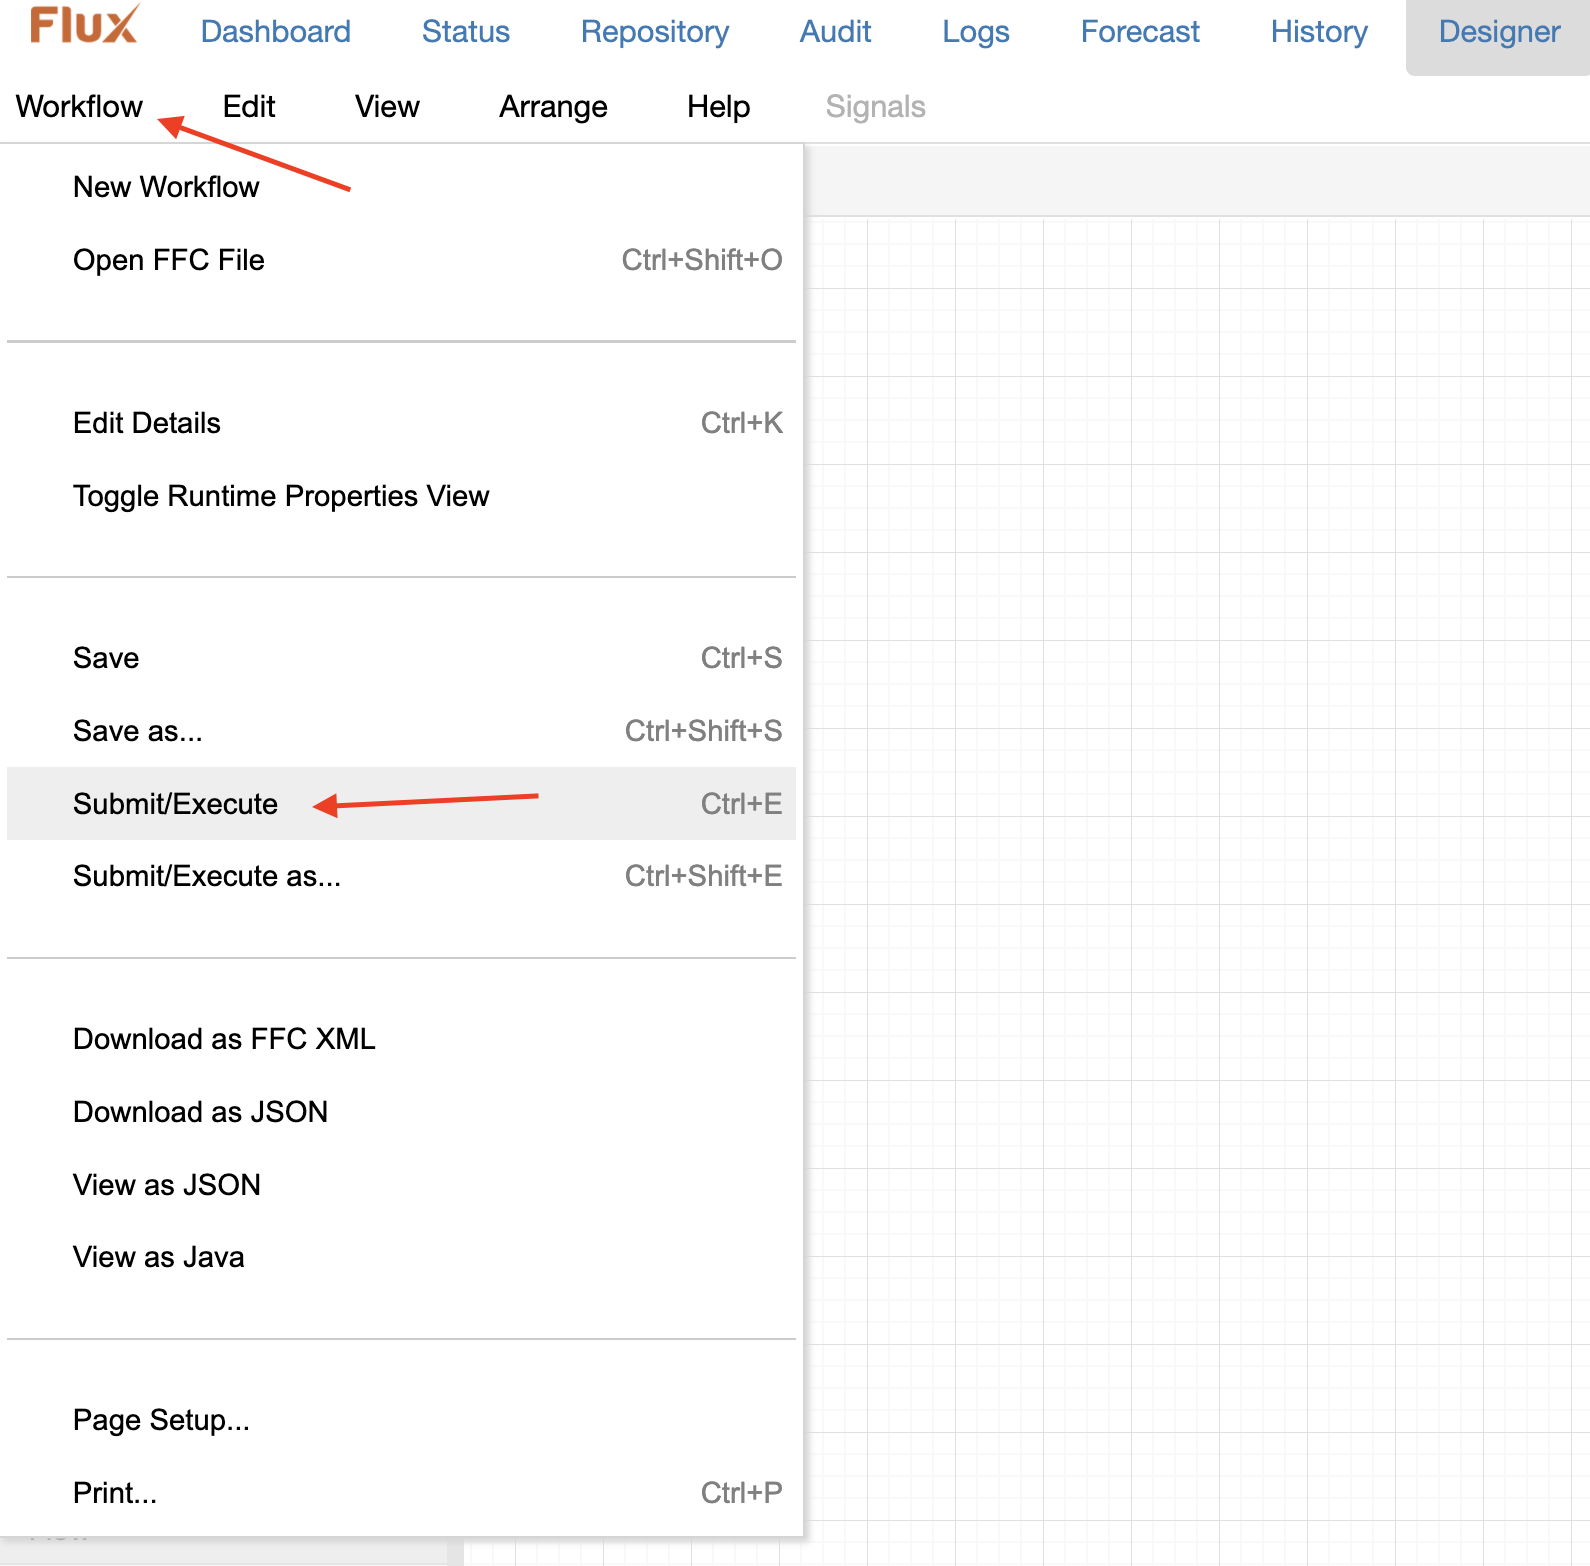
To execute the workflow, click “Submit/Execute” under the Workflow tab near the top left of your screen. Or you can use the keyboard shortcut, Ctrl+E.
Creating This Example from Scratch
The following steps are required to create this flowchart from scratch.
Creating Actions
Once you are in the web-based designer, locate the actions and triggers used in this example to the left of the workspace. You can drag & drop the actions and triggers into your workspace and arrange them as needed.
The actions that are used in this example can be found in the following categories:
- Action Name: “Java Action”, Category: “Java”, Quantity: 1
- Action Name: “Console Action” , Category: “Core”, Quantity: 1
Setting up Flows
To create the flows that go from one action/trigger to the next just follow the 3 simple steps provided below. This example includes the necessary actions.
-
Hover over the action you want to draw from. You’ll see four blue arrows appear around the action.
- Click and hold on one of the blue arrows you wish to draw the flow from.
- Drag your cursor to the action or trigger you wish to draw the flow to and release.
Renaming Actions
It is always a good idea to give the actions and triggers more descriptive names. Giving actions specific names will help you in remembering what each action/trigger in your workflow is doing. Follow the steps below to edit an action’s name.
To edit an action’s name:
Click once on an action, then begin typing.
Action Names
In this example the actions have been renamed to the following:
· “Java Action” to “Einstein”.
· “Console Action” to “Printer”.
Editing Action Properties
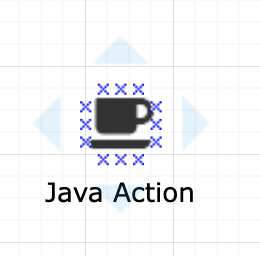
Java Action
Once a Java Action executes in a workflow, the Java Action’s listener class is invoked. This listener class must implement flux.ActionListener and override the actionFired(KeyFlowContext) method. For this example, the java class “MyJavaListener”, located in “example/end_users/java_action” under your Flux installation directory, is implemented for you. This class takes the sum of the numbers “PI” and “E” and puts the result into the flow context. To register this listener with the Java Action, double-click the “Einstein” Java Action within your drawing canvas. The action’s “Listener” is represented below:
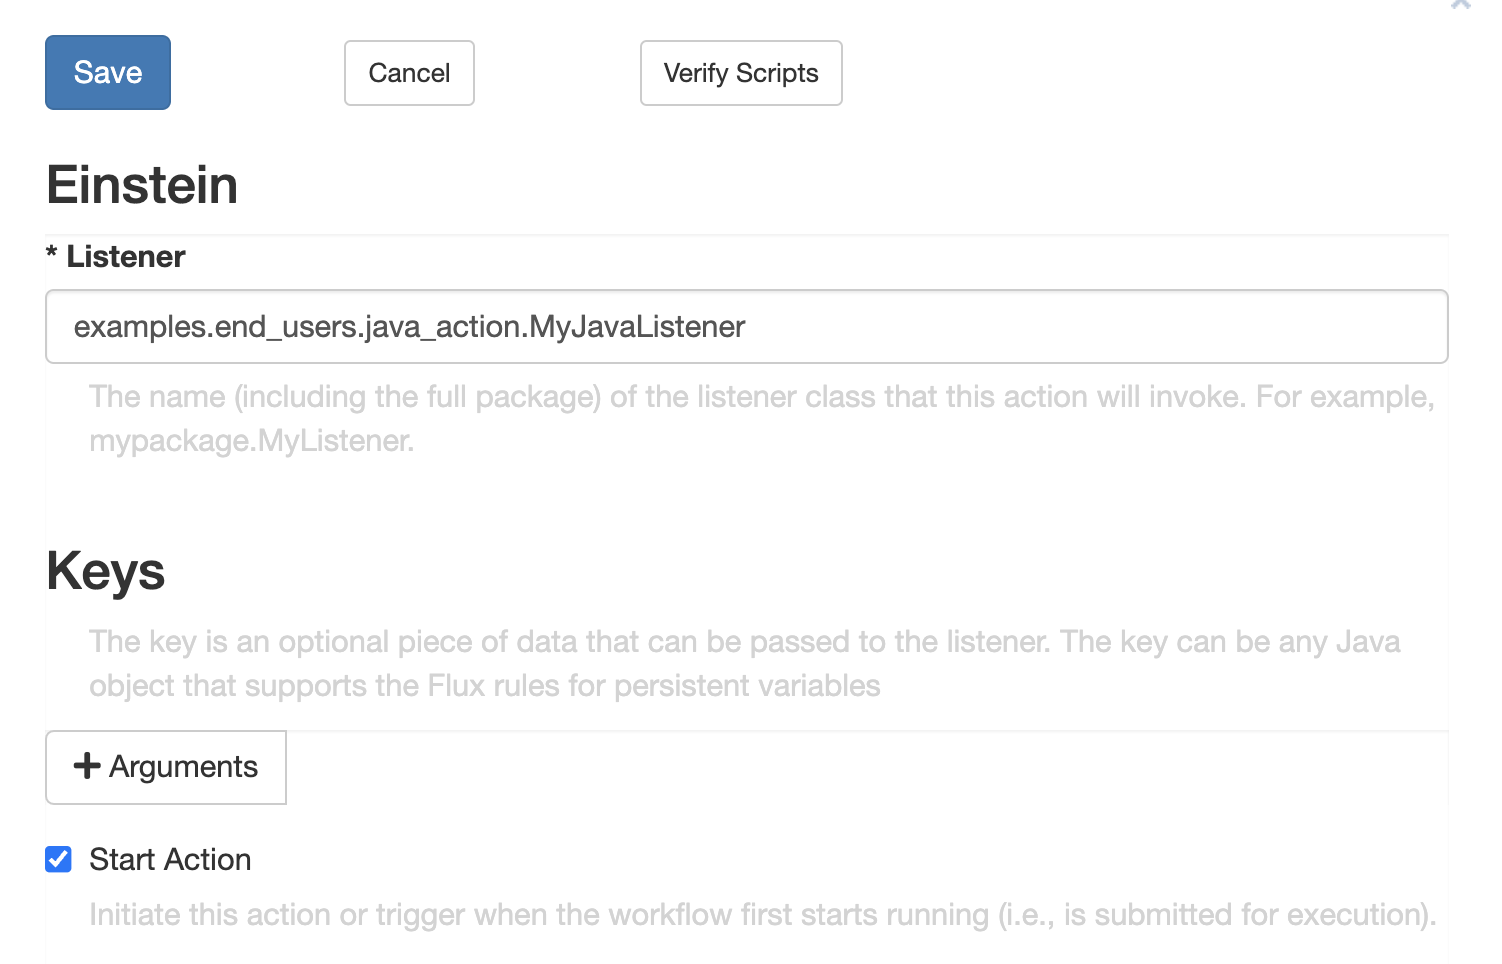
The ‘Listener’ field inside the “Action Properties” panel can be edited to include the listener’s information, in this example ‘examples.end_users.java_action.MyJavaListener’ is used. Once completed, the java class “MyJavaListener” will be registered with the Java Action.
NOTE: The Java Action you wish to register with the Flux engine must be within the engine’s class path.
Setting up a Runtime Data Map
A runtime data map is used in this example, on the flow from the “Einstein” Java Action to the “Printer” Console Action. This runtime data map provides a way for “Printer” to display the result of the calculation made by “Einstein”. You can create runtime data maps on flows by double-clicking the flow.
Once the Flow Properties dialog is opened, click on the ‘+’ button under the ‘Runtime Data Map’ to add a runtime data mapping.
In the Source section of this example’s runtime data map, ‘Flow Context Source’ is selected and the “source value” is ‘calculation’. The word ‘calculation’ is the name the calculation from “MyJavaListener” is mapped. In the Target section of the data map, ‘Action Property Target’ is selected, and the action’s property to which the calculation is being mapped to is the Console action’s ‘Message’.
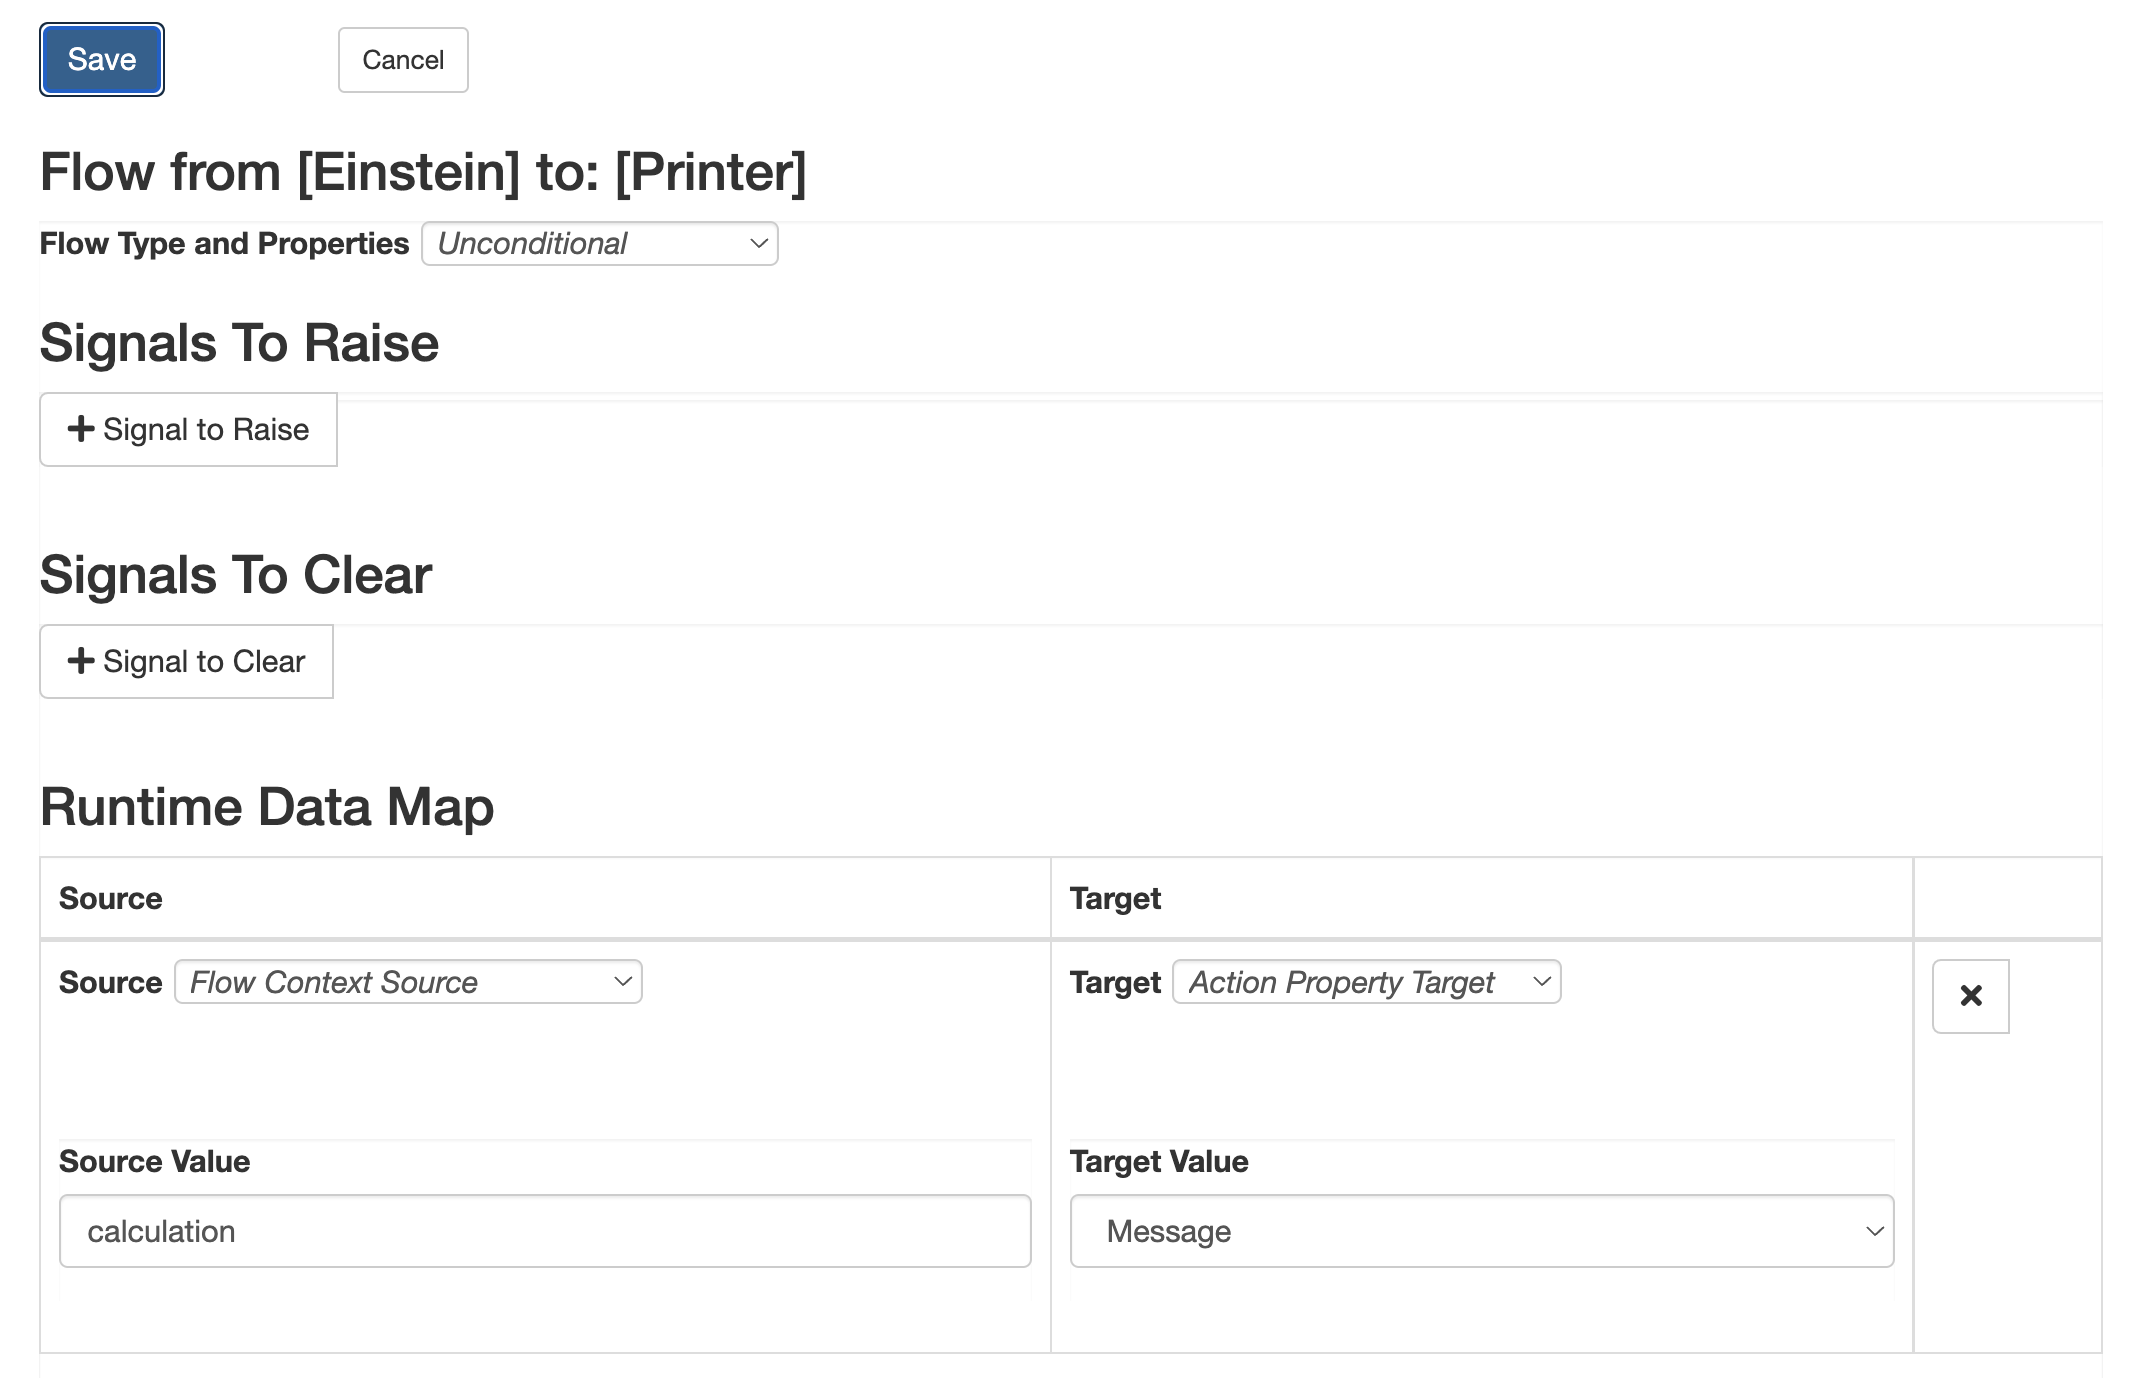
Once the runtime data map is complete, click the ‘Save’ button to save the data map.
Saving the Workflow
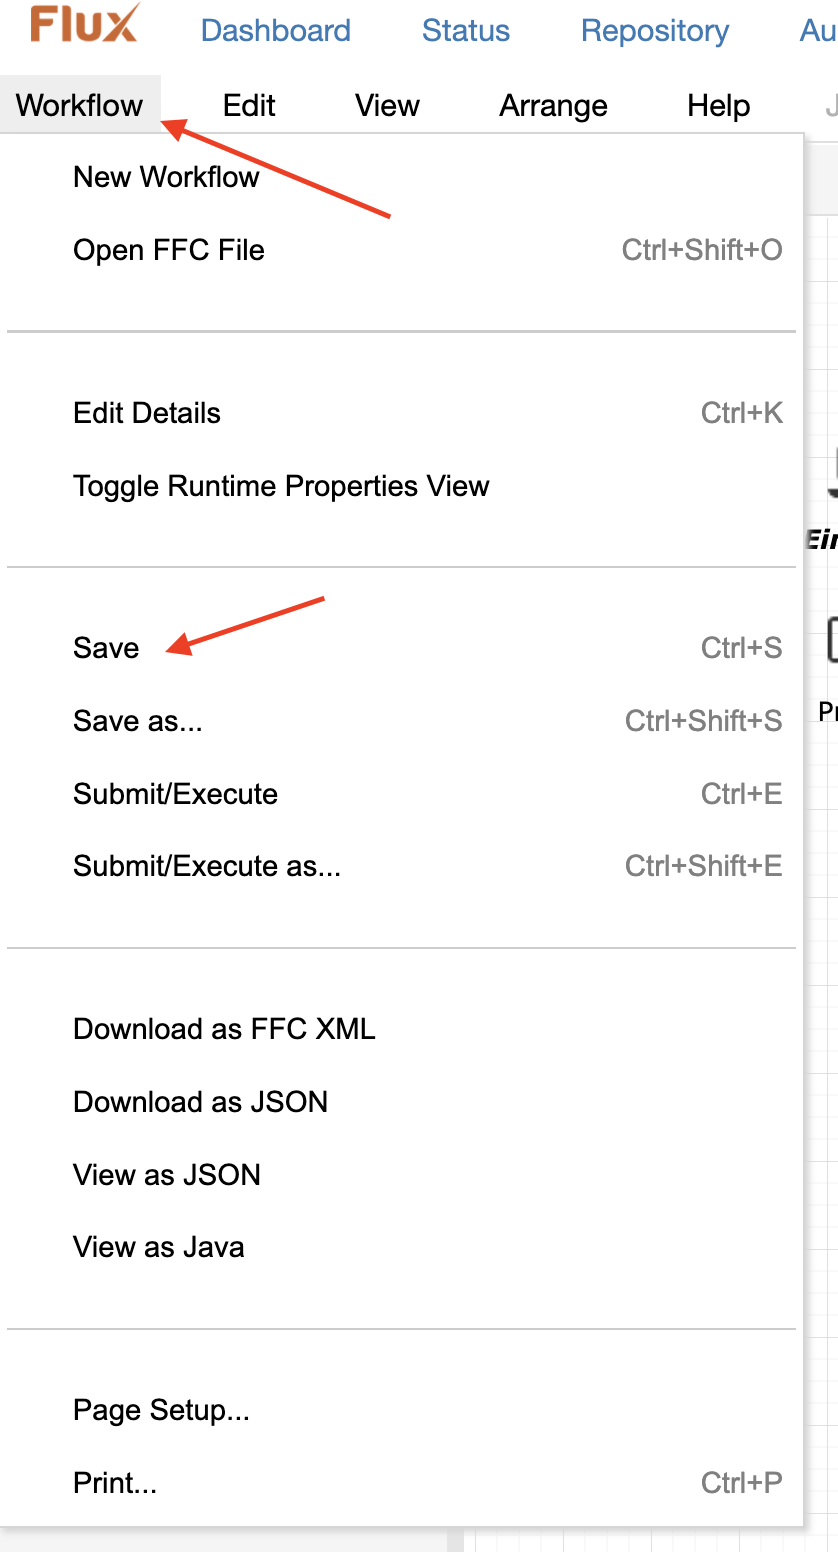
After editing your workflows, remember to save your changes to the Repository. To do so, click “Save” under the workflow tab near the top left of your screen. Or you can use the keyboard shortcut, Ctrl+S.
Running the Workflow
Next, export your workflow to the engine. You can do this step by clicking on ‘Submit/Execute’ in the Workflow tab near the top left of your screen, or by using the keyboard shortcut Ctrl+E. You may also export a workflow straight from the Workflows Repository by selecting the workflow you wish to export and clicking on ‘Submit’.

A confirmation window will appear if the workflow was successfully exported. If there is an error message, look over this example carefully, and correct any mistakes made.
Once the workflow has run, view the console from which your engine is running. The sum of the numbers PI and E will be printed out to that console.